Chorley Tile Cleaning

Chorley Tile Cleaning

Welcome to my Work History archive where you will find examples of the cleaning and renovation of tiles carried out in Chorley.

Porcelain Tile and Grout Renovation Chorley

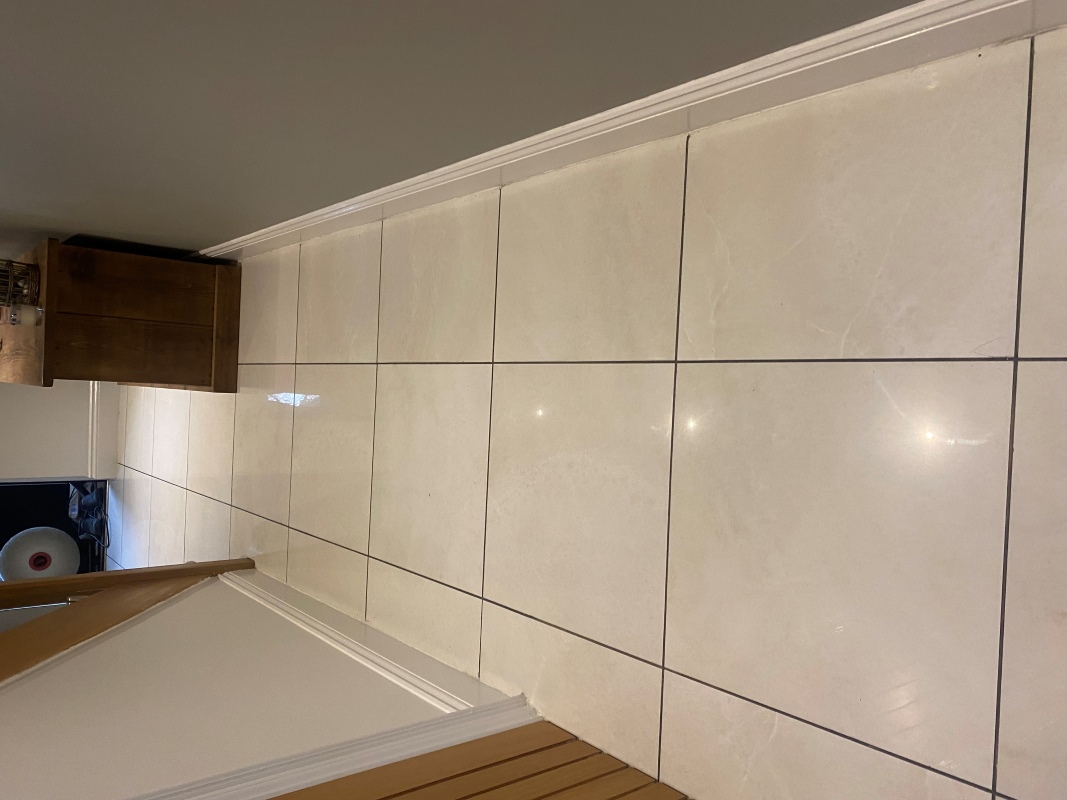
Applying Charcoal Grout Colourant to a Porcelain Tiled Floor in Chorley

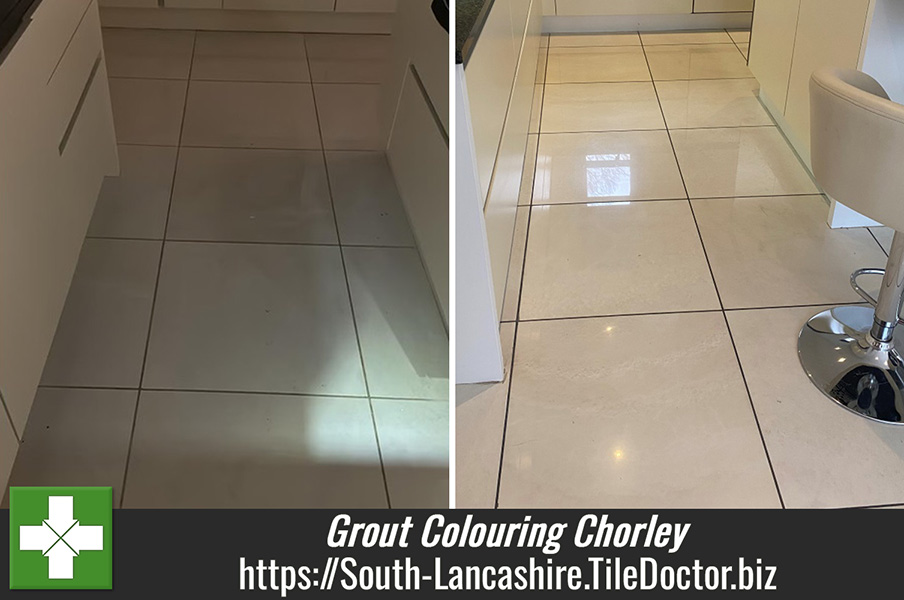
The owner of this Kitchen in Chorley contacted Tile Doctor to see what could be done to improve the grout on her Ceramic tiled floor. The tiles where laid throughout the hallway, kitchen, utility and large diner and the grout which was once white was now badly soiled and made the whole floor look very dirty.

The tiles were also dull and had lost their original sheen in parts. In addition, the kitchen was about to be ‘wrapped’ to change it from cream to dark grey and there was a concern that the grout would no longer match the aesthetic of the revamped kitchen. They had considered replacing the floor or re-grouting but thought they would contact use first to see what we thought.

Porcelain Tiles and Grout Before Renovation Chorley

Having discussed the floor in detail over the phone I recommended our Grout Colouring service which is a service we offer that rejuvenates grout with the application of a hard-wearing epoxy colourant which is available in 11 popular colours. The other advantage of this product is it is easy to apply and doesn’t generate the mess you get with grout replacement.
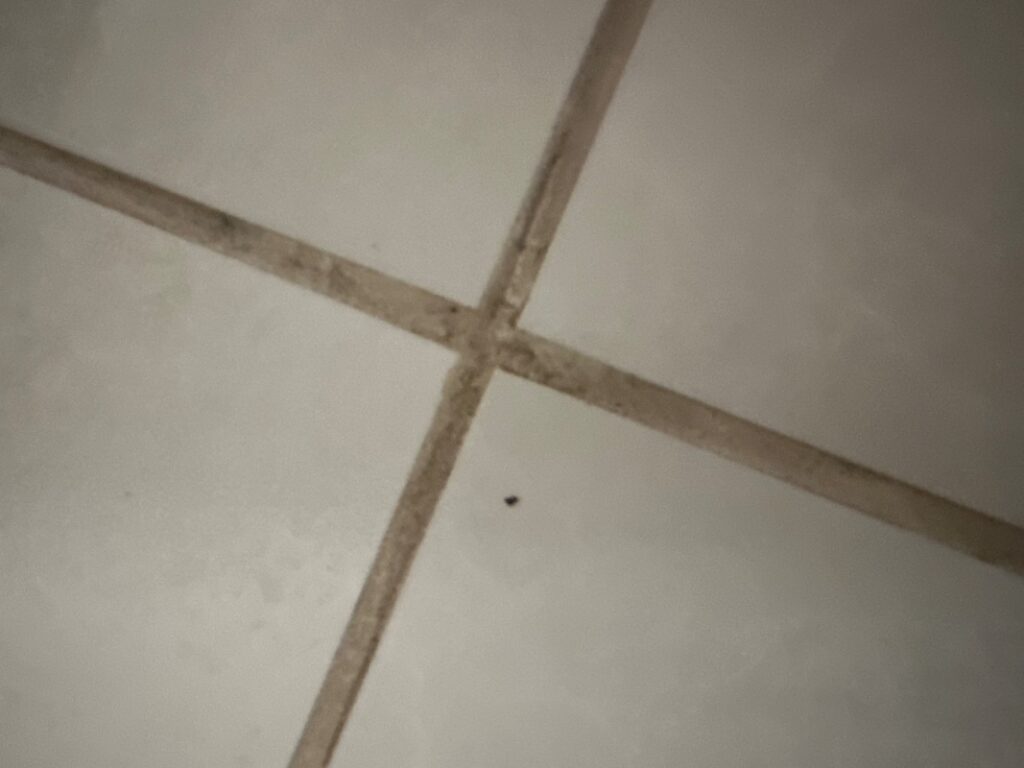
Porcelain Tiles and Grout Close-Up Before Renovation Chorley

Happy with my suggestion and quote for renovating the tiles and colouring the grout with a Charcoal Grout Colourant a date was set to do the work.

Grout Cleaning and Colouring a Porcelain Tiled Floor

To get the grout clean and prepare it for the grout colourant a Pre-Treat Cleaner was sprayed onto the grout and then scrubbed in by hand using a stiff brush. This product gets the grout as clean as it can be and etches the grout so it forms a stronger bond with the grout colourant which would be applied next. The tiles were then rinsed with water to remove the soiled solution and then extracted with a wet vacuum.

There was a lot of grout to cover so work focused on the grout cleaning until a section had dried and then I was able to go back to it and start applying the charcoal grout colourant. The process is quite simple although time consuming and involves painting the colourant onto the grout line with a small brush and then wiping any excess off the adjacent tile before it sets.

Once all the grout had been coloured and set the floor was given a quick polish with a soft white buffing pad fitted to the rotary machine. When finished the floor looked so much cleaner and the Porcelain tiles had a nice sheen.
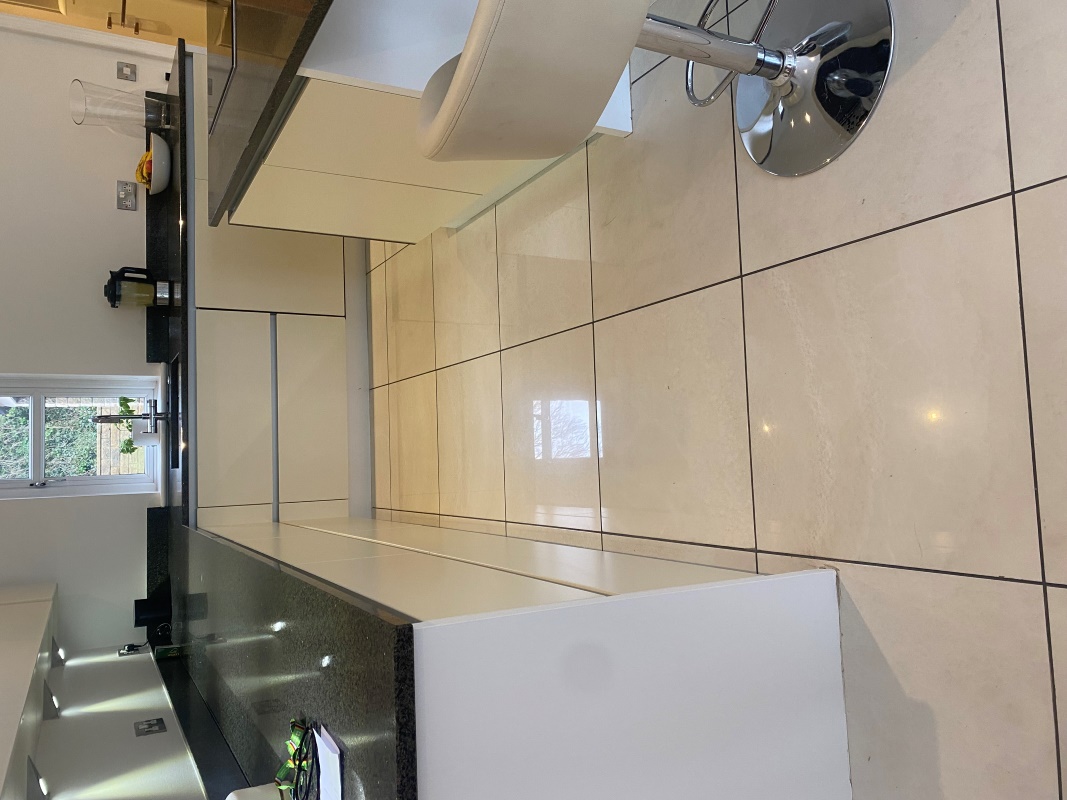
Porcelain Tiles and Grout After Renovation Chorley Porcelain Tiles and Grout After Renovation Chorley

My customer was very happy with the finish and left the following feedback:

“Kevin is fantastic both from a service & knowledge perspective. Extremely efficient. The kitchen hallway floor now is like new again after 11 years”

Before leaving I encouraged them to avoid the use of steam cleaners and only to use Tile Doctor Neutral Tile Cleaner for maintenance cleaning going forward as anything stronger could affect the colourant.

Applying Charcoal Grout Colourant to a Porcelain Tiled Floor in Chorley Read More »
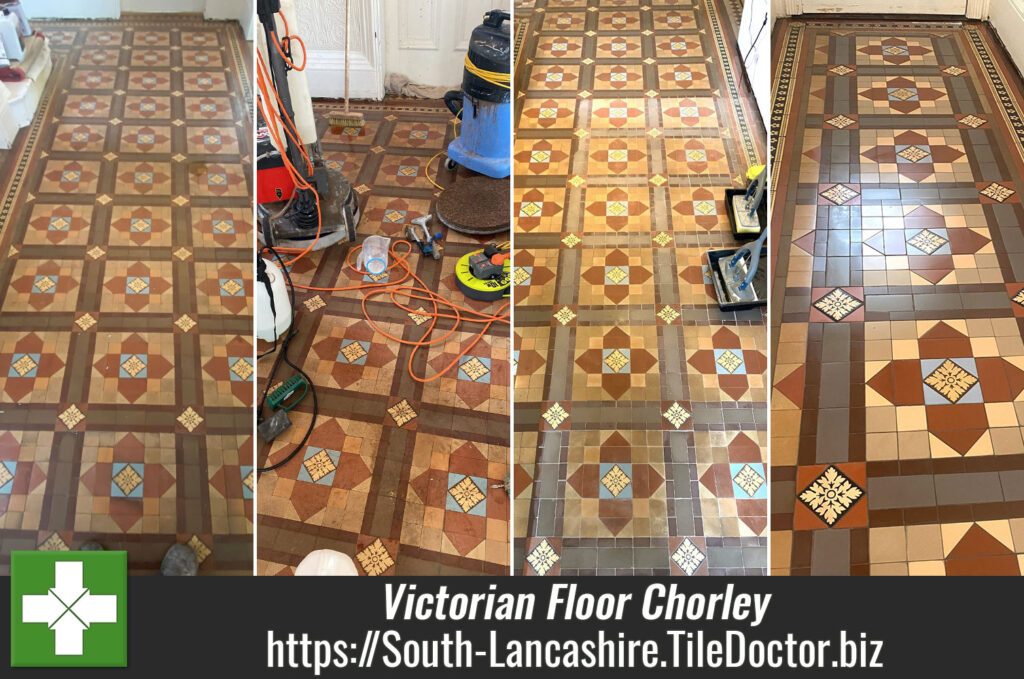
Victorian Floor Renovation Chorley

Restoration of Victorian Hallway Tiles in Chorley

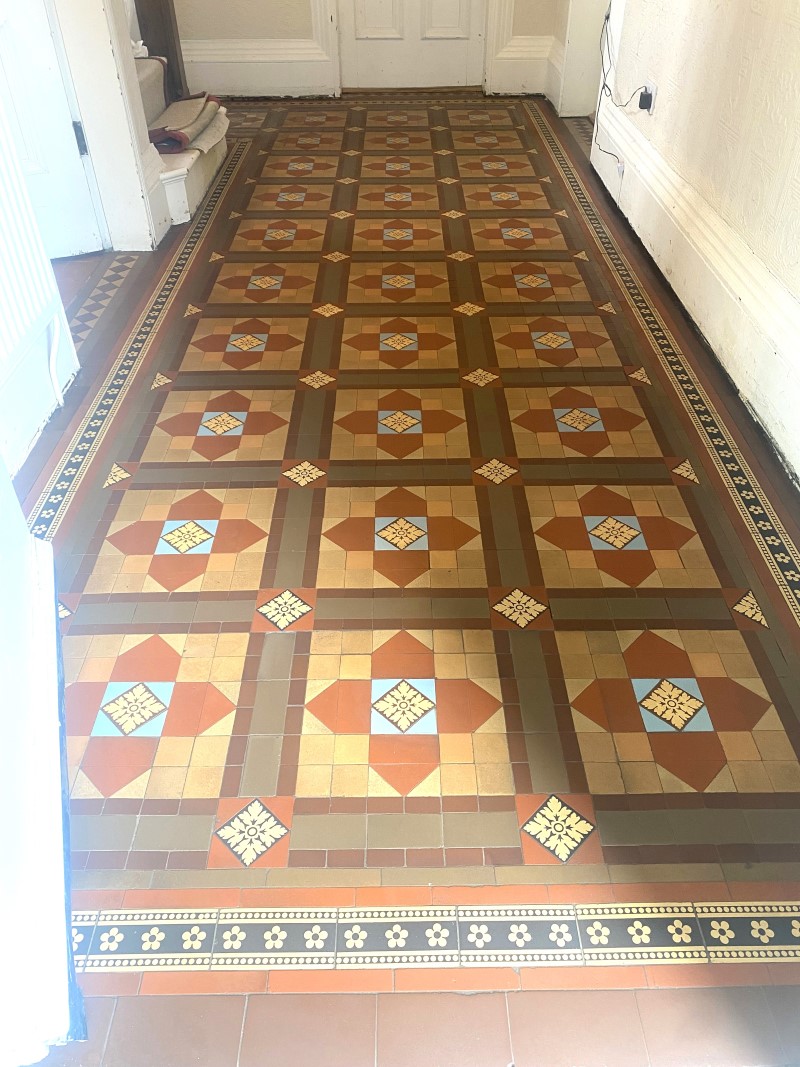
Joanna contacted us with regard her late Victorian (1893) L shaped tiled hallway at their large family home in Chorley.

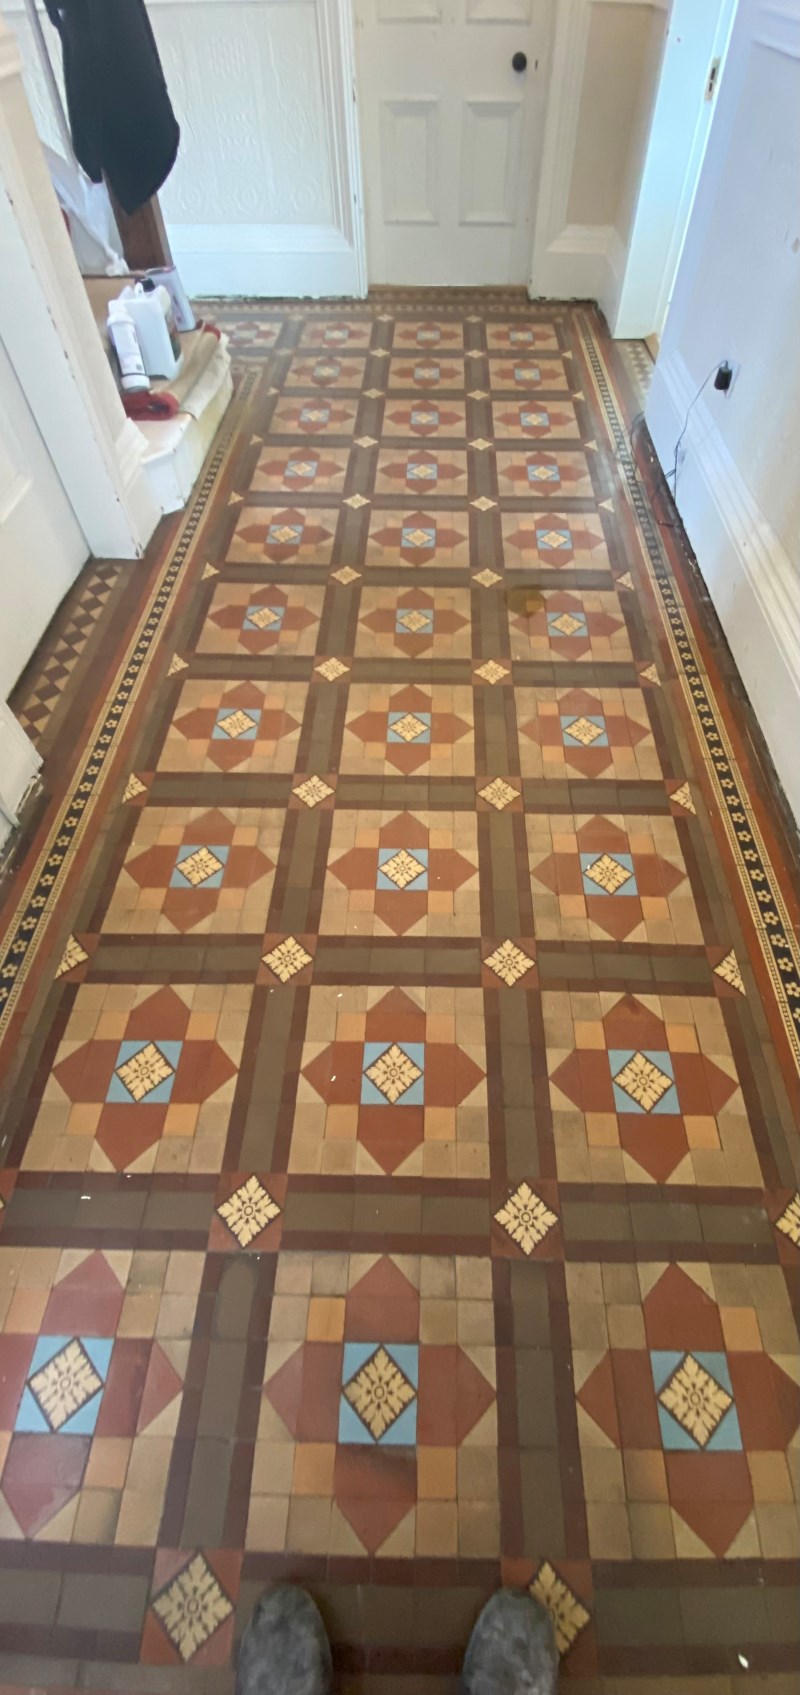
They had discovered the floor under carpet during renovation work some years ago and had some work done to replace damaged and missing tiles. However, the floor had not had a deep clean an and therefore much of the floor had ingrained dirt so never looked clean. Having lived with this the problem which had only got worse over time we were asked to finish the renovation.

I went over to property to survey the floor and work out a plan to restore it. Whilst there I realised the property had a cellar and was concerned that water from the vigorous cleaning process may seep downstairs resulting in staining to the ceiling. To avoid this, I realised I would need to complete the cleaning using low moisture gel-based products. Whilst there I also took several moisture readings with a damp meter which indicated that it would be best to use a fully breathable non acrylic sealer to protect the floor.

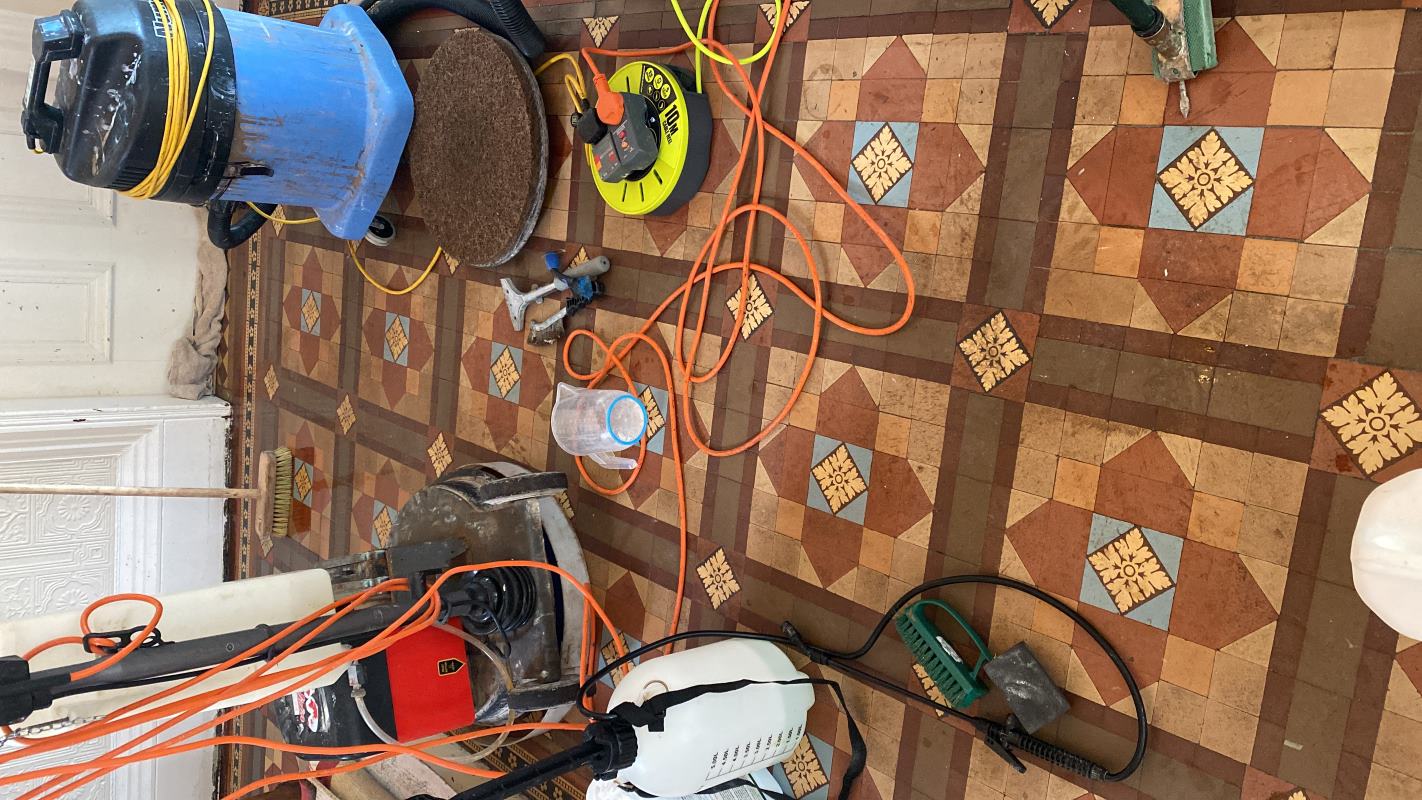
Victorian Floor Before Cleaning Chorley Victorian Floor Before Cleaning Chorley

Following the survey, I was able to work out a comprehensive plan for restoring the floor and provide the owner with an accurate quote for the work which was accepted.

Deep Cleaning a Victorian Tiled Hallway

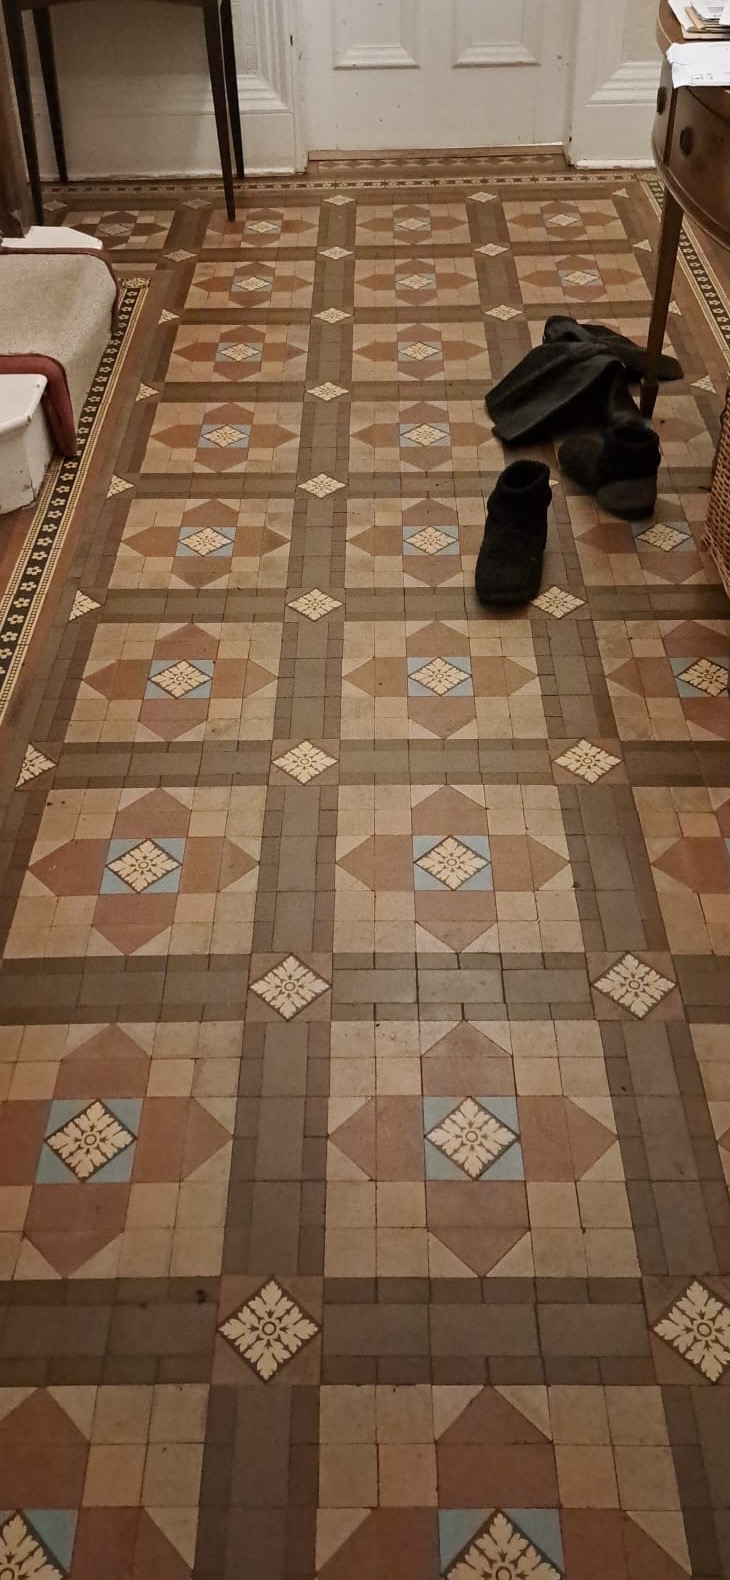
Working in sections work commenced with a layer of Tile Doctor Oxy-Gel which was left to dwell before working it in with a low-speed weighted buffer fitted with a coarse 100-grit milling pad. The slurry generated was then vacuumed away before giving the floor a light rinse, working in small sections, and quickly vacuuming away the waste.

Victorian Floor During Cleaning Chorley Victorian Floor During Cleaning Chorley

To further clean the tiles a thin layer of Tile Doctor Remove and Go was then applied and after five minutes scrubbed in using a 200-grit coarse milling pad, vacuuming the waste away afterwards.

With the floor showing great improvement we set about tidying up the edges using a set of diamond hand burnishing blocks. A scraper and a hand brush were used to remove paint splashes, carpet adhesive and dirt already loosened by the main clean. This was followed with the application of a 400-grit burnishing pad, again working in small areas to minimise water getting into the floor

Last step of the restorative cleaning process was to treat the tiles to an acid rinse using Tile Doctor Acid Gel. This was allowed to dwell for around five to ten minutes before being worked in with a Black scrubbing pad. The acidic nature of the product neutralises the alkaline cleaners used earlier and dissolves alkaline salts built up in the tiles which is a common problem on these older floors. The soiled solution was extracted as before and rinsed thoroughly with cloths and water to minimise moisture levels, vacuuming away the waste as I went.

The floor was allowed to dry thoroughly, and a damp meter reading confirmed the moisture levels back to where they started. A quick dry burnish using an 800-grit burnishing pad with dust vacuumed away was the final preparation before sealing could commence.

Sealing a Victorian Tiled Hallway

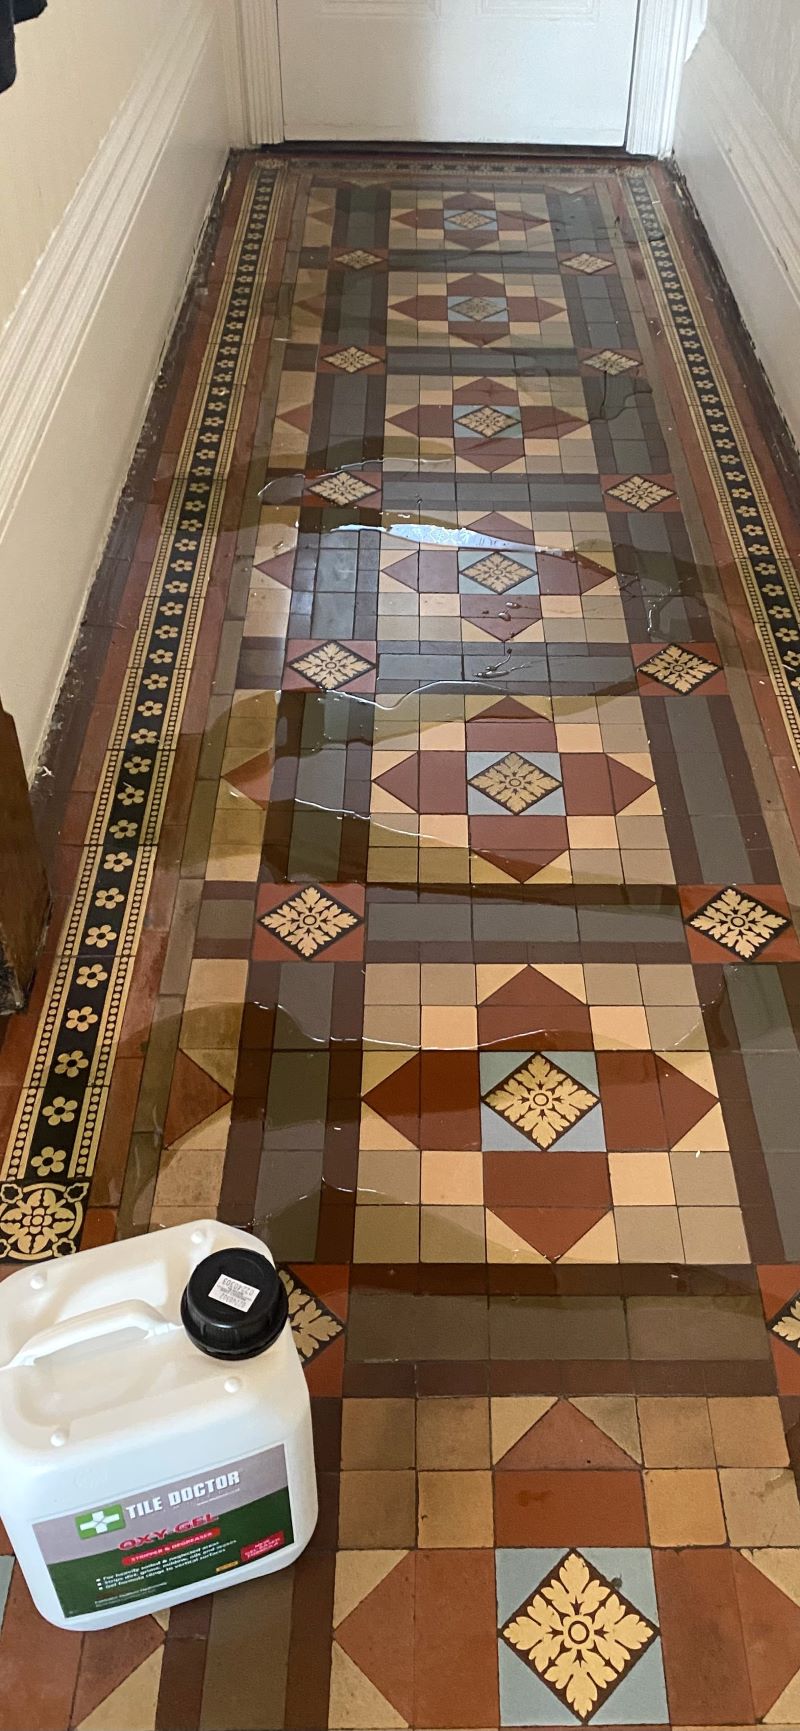
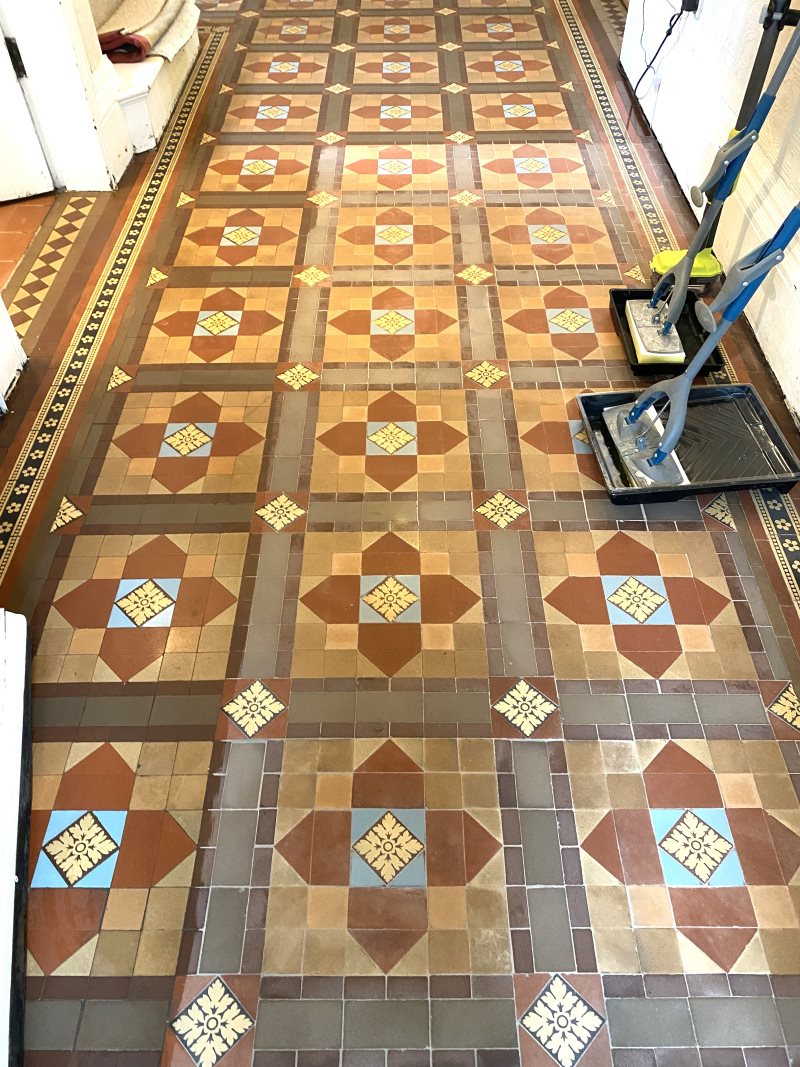
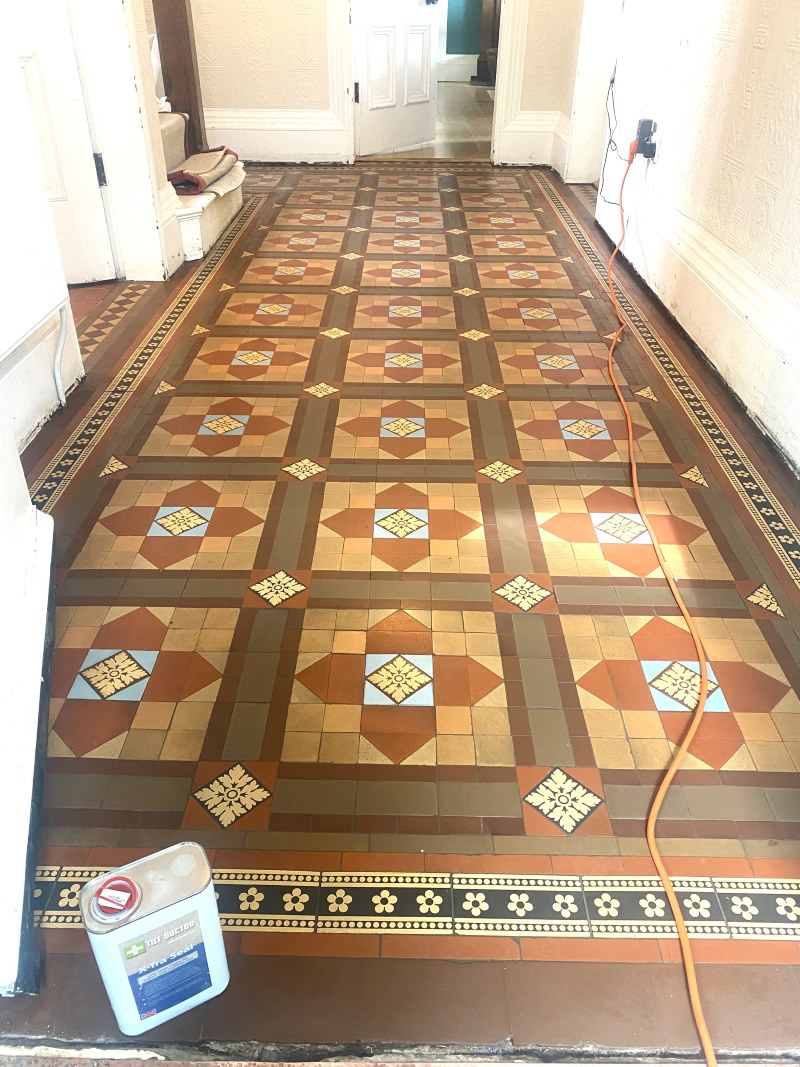
After testing sealers, the preference was to revive the colours in the tile and give the floor a subtle sheen. Based on this I applied Tile Doctor X-Tra Seal which was ideal for as first coat revived the colours in the tile and the second coat added a very subtle sheen finish.

Victorian Floor During Sealing Chorley Victorian Floor During Sealing Chorley

After allowing the floor to partially dry, a light burnish with a soft white pad was the final part of the process.

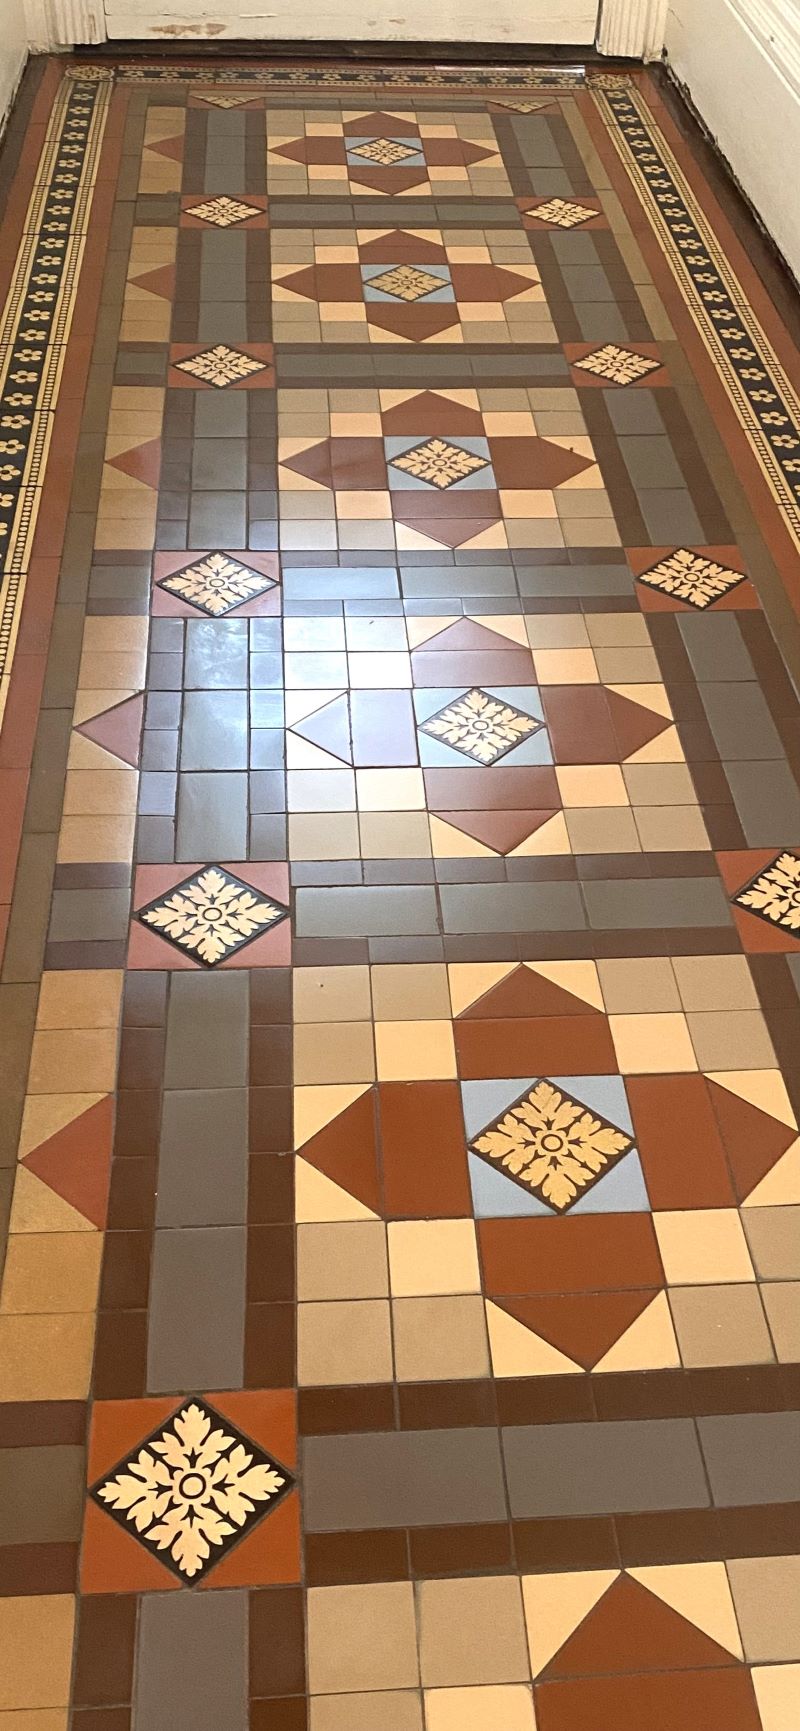
Joanna stated she was very pleased with the results, and we discussed aftercare using Tile Doctor’s pH Neutral cleaner to prolong the life of the sealer. She also later gave a 5 Star review along with the following comment:

“Kevin was excellent. He responded promptly to my enquiry and answered all my questions. Delighted with my lovely clean floor!”

Victorian Floor After Sealing Chorley Victorian Floor After Renovation Chorley


Professional Renovation of a Victorian Tiled Hallway in Lancashire

Restoration of Victorian Hallway Tiles in Chorley Read More »

=================================

South Lancashire Tile Doctor

================================= Read More »

Scroll to Top