Grout Cleaning

Welcome to my Work History archive where you will find detailed examples of the cleaning and renovation of Grout carried out in South Lancashire

Cleaning and Renovating Grout

The top layer of grout is porous and can absorb grease, dirt and limescale. Spillages such as wine, lemonades or greasy substances will cause marks and patches in the joints in the floor. Grout between wall-tiles particularly in damp areas like bathrooms will become dirty and unattractive as a result of Mould, Mildew and Limescale.

Mould is one of the most unsightly problems, which usually starts off in the wettest area of the room, this could be the bottom of the shower or bath, then starts to spread and if left unchecked could cover a large area of the wall.

Another common issue we find is a problem known as Grout Haze or Grout Smearing where a thin layer of grout has been left to set on the surface of the tile. Once grout has set it is difficult to remove.

Discolouration of grout joints in bath or shower areas due to continued use of acid formulated shampoos and soaps. This causes yellow orange and pink stains to the grout over even a short period of time. Whilst Grout Joints can be cleaned, badly stained grout may need to be re-coloured.

Protecting your grout in advance with a sealer will prevent most of these issues and although relatively unknown in the UK, protection awareness is growing. Sealing forms an invisible barrier between the grout and the surface, this will then protect your investment for years to come.

We have solutions for all the problems listed above and below you will find detailed examples of work we have carried out in the past to resolve many of these issues. It should give you some idea of what’s involved and what can be achieved with the right techniques and products.


Limestone Floor Cleaning and Polishing Colne

Polishing and Sealing a Dull Limestone Tiled Floor in Colne Burnley

Earlier this year I received an enquiry from Colne regarding a Limestone tiled floor that needed attention. The floor had been installed a few years earlier throughout much of the ground floor including the utility, hallway and large kitchen diner. It was last sealed by the installer and since then it had become quite soiled in parts, particularly the heavy traffic areas and grout. The client hoped for a lighter finish, with a light sheen/semi honed finish to the stone and cleaner grout.

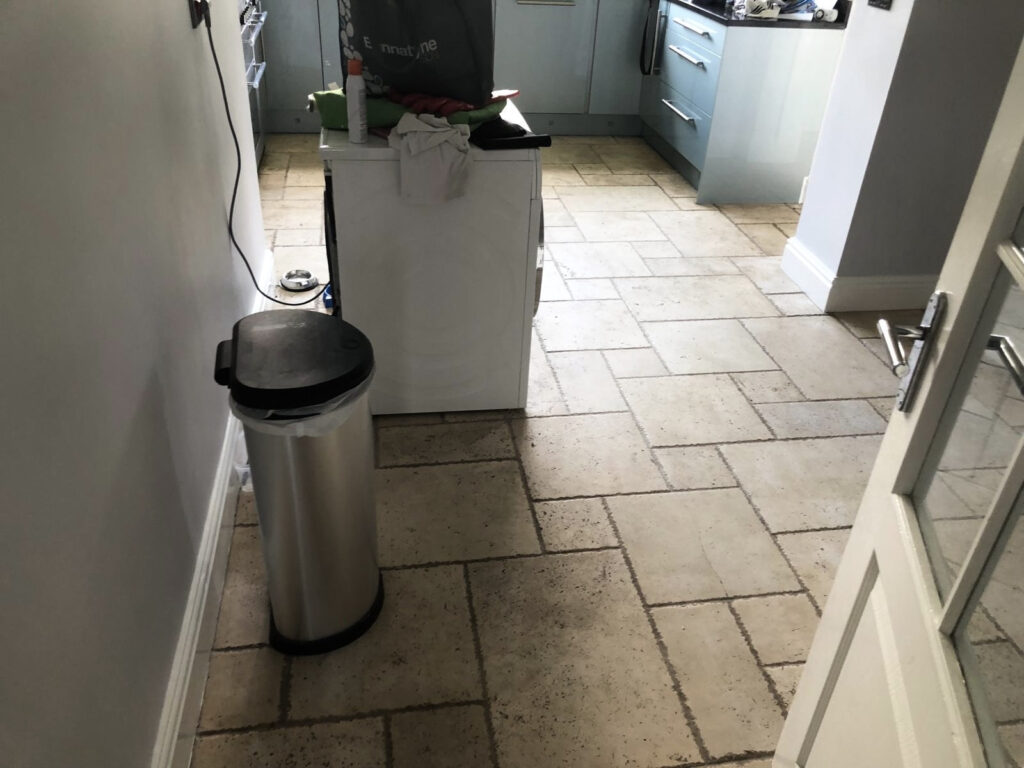
Limestone Floor Before Cleaning Colne

The protective sealer had clearly worn down and was now letting dirt into the pores of the stone making it difficult to clean effectively. After surveying the floors, I recommended burnishing the Limestone with a set of diamond pads and then re-sealing the stone with a suitable modern sealer that would give the finish they were looking for. Happy with my quote we set a date to start the work.

Limestone Floor Before Cleaning Colne Limestone Floor Before Cleaning Colne

Cleaning and Polishing a Limestone Tiled Floor in Colne

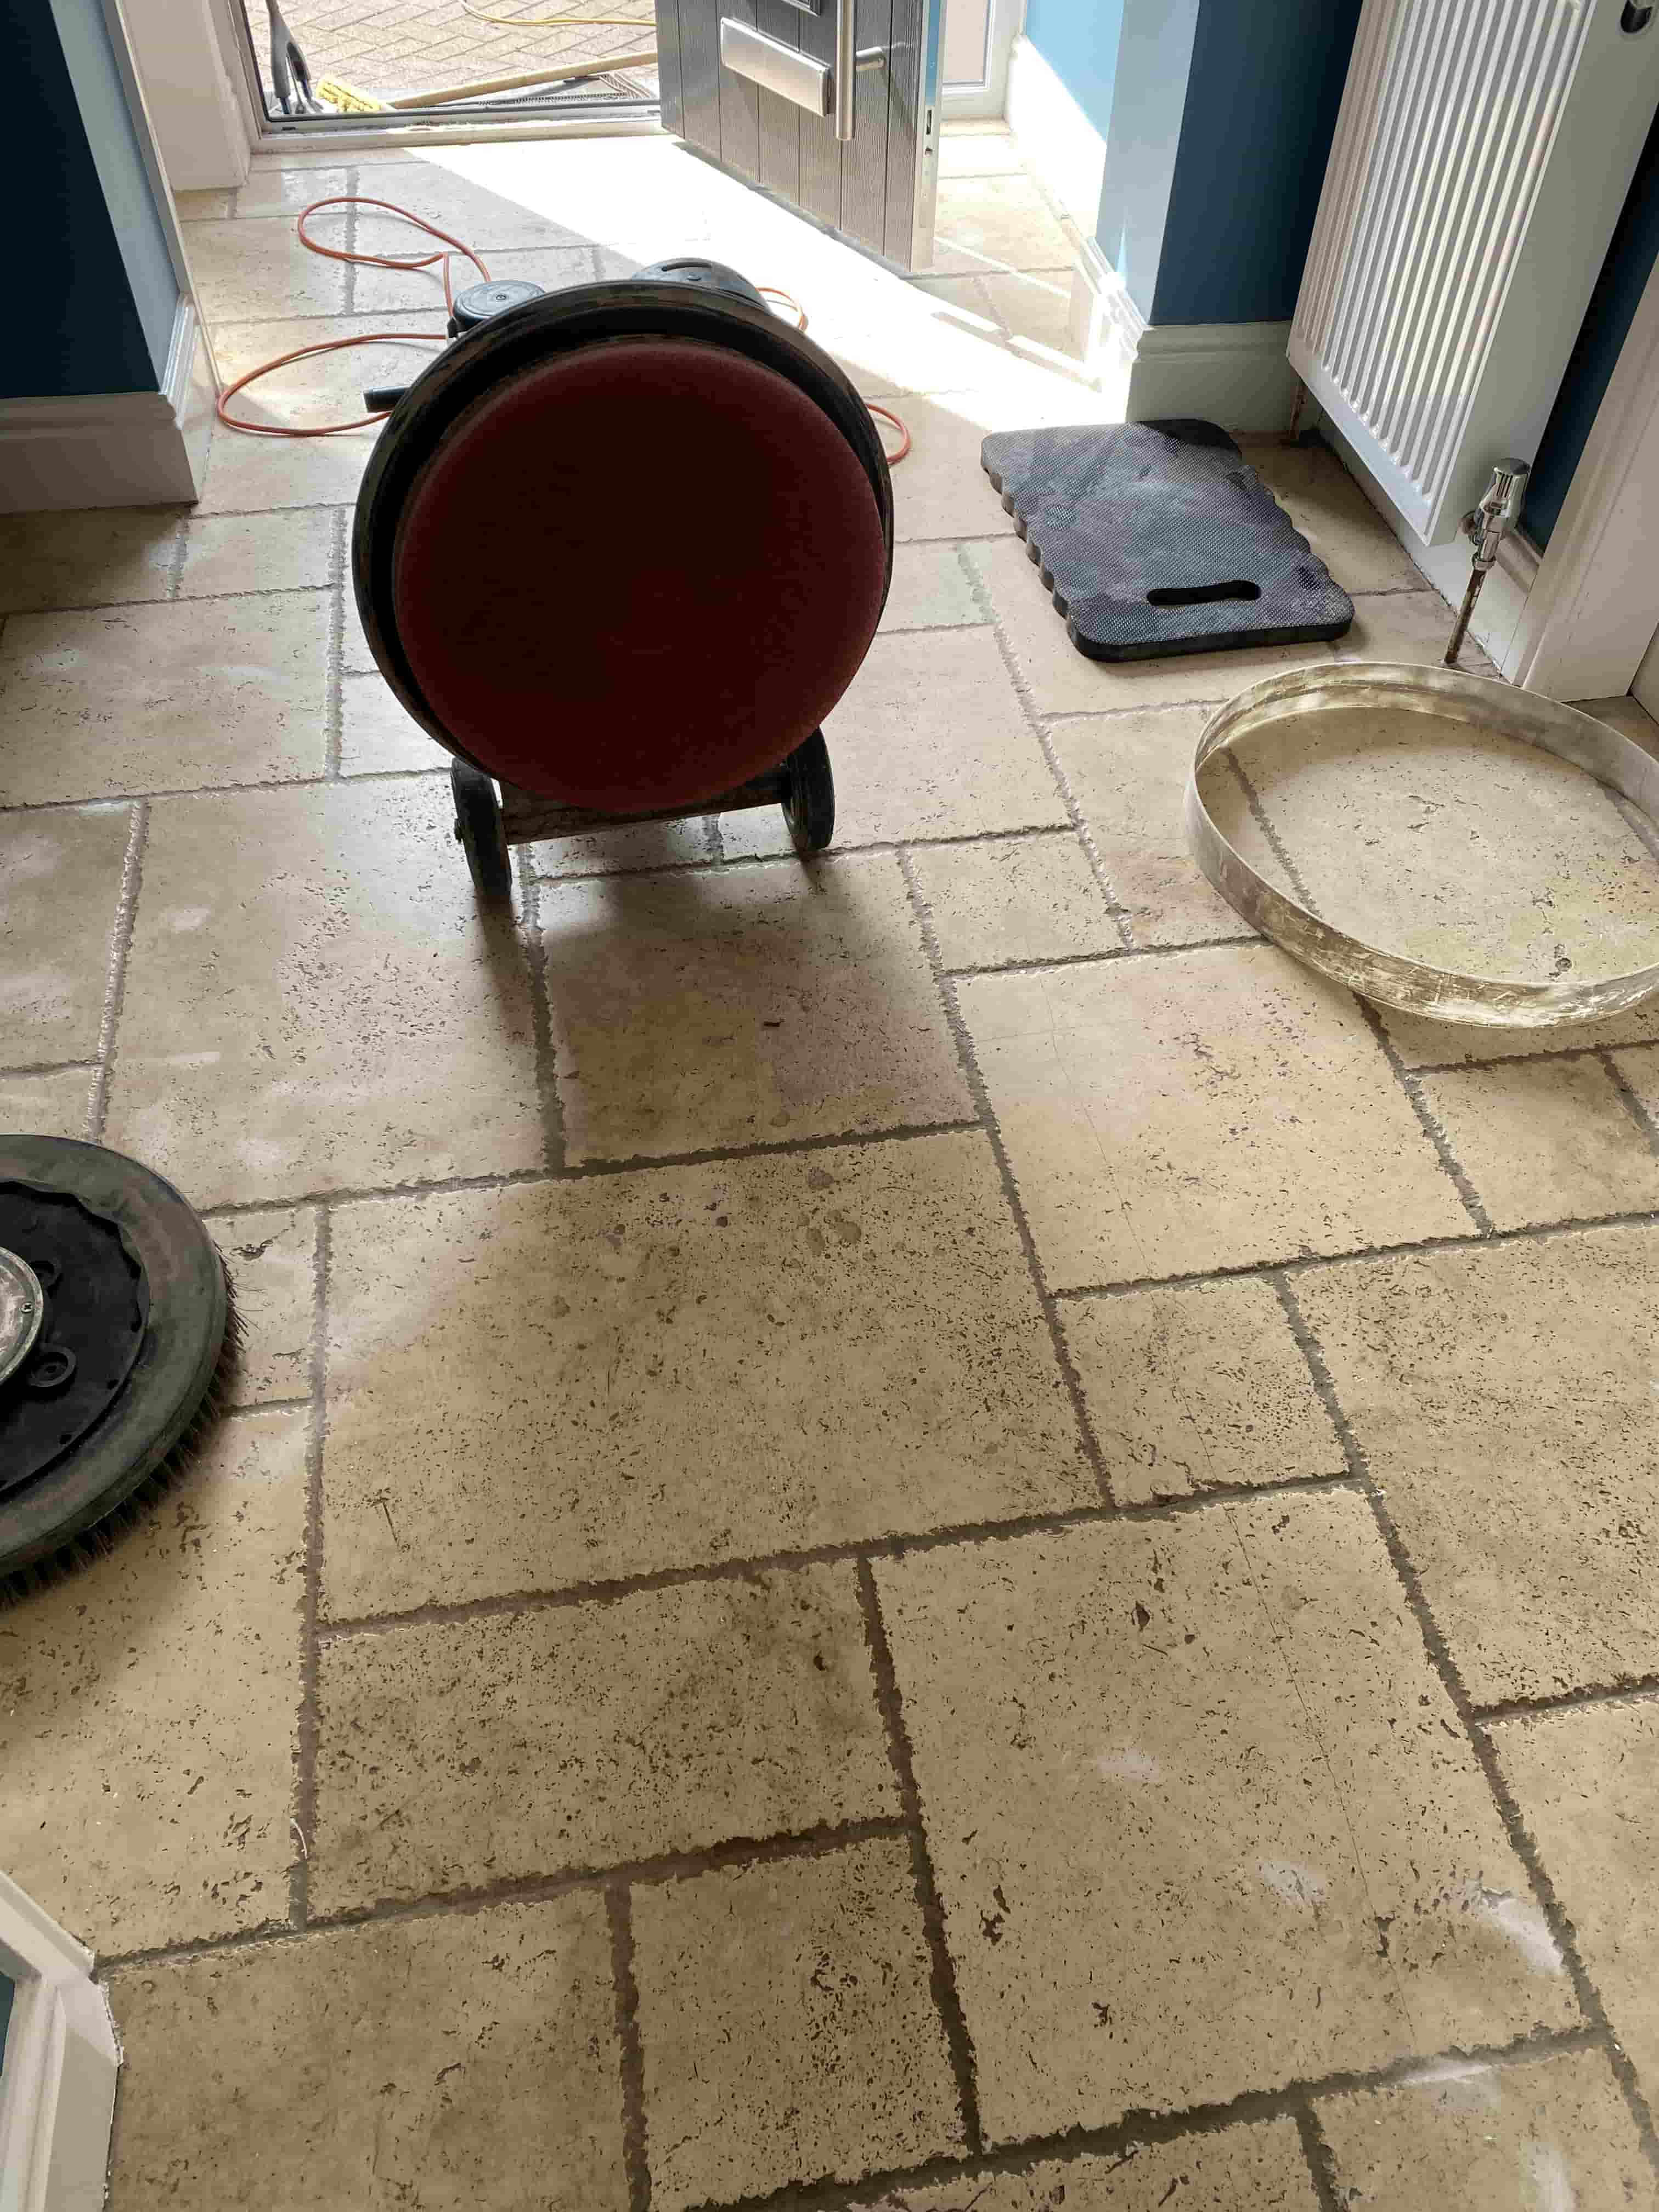
Diamond burnishing pads are the best tool for renovating honed stone floors like Limestone and after setting up the equipment work started with the application of a coarse 400-grit pad.

Limestone Floor During Cleaning Equipment Setup Colne

The pad is fitted to a weighted buffing machine and applied to the floor at low speed with water to lubricate the process. This coarse pad strips off old sealers and cleans the stone and is run over each tile three times, once done the resultant soiling is rinsed off with water and extracted with a wet vacuum.

The burnishing process was then continued with finer 800 and 1500-grit pads which slowly restore a honed finish to the stone. After each pad is run over the floor the dirty water was extracted using the wet vacuum as before.

The next step was to scrub the grout joints using a medium dilution of Tile Doctor Pro-Clean. The solution is left to soak into the grout for ten minutes before being scrubbed in by hand with a stiff brush. Once done the now dirty solution was rinsed off with more water and extracted using the very useful wet vacuum.

The floor was then reviewed and any issues spot cleaned using a repeat of the various processes. Part of this work included hand finishing the edges and corners using a set of small hand burnishing blocks of different grits.

A lot of water was used during the cleaning process and the floor needs to be dry before applying the sealer. So once all the work was done the floor was dried as much as possible with the wet vacuum and then left to dry out for 24 hours.

Sealing a Polished Limestone Tiled Floor in Colne

On my return I set about polishing the Limestone using the last pad in the burnishing pad set which is an extra fine 3000-grit. This last pad is applied to the floor dry with only a little water sprayed onto the stone as you progress. It adds a lovely deep shine to the Limestone and leaves the floor dry and ready to be sealed.

To finish Tile Doctor Ultra-Seal was then applied to the Limestone, this is an impregnating sealer that provides a natural look finish. It works by soaking into the stone occupying the pores and thereby preventing dirt from becoming ingrained there, this ensures dirt remains on the surface where it can be easily cleaned away.

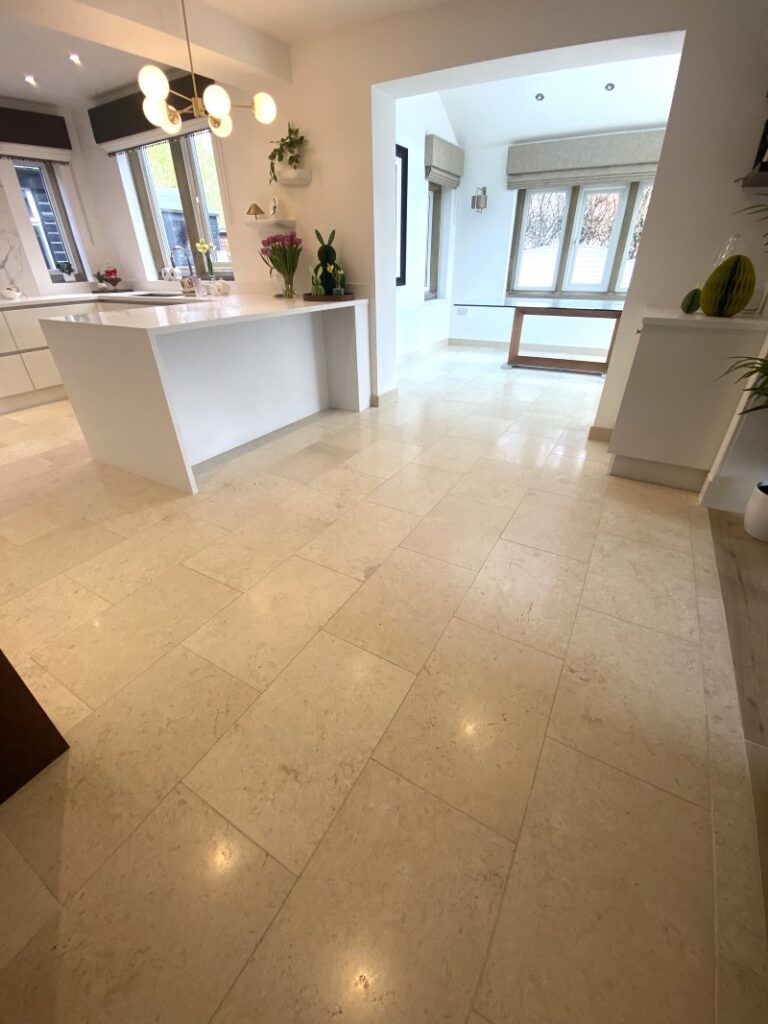
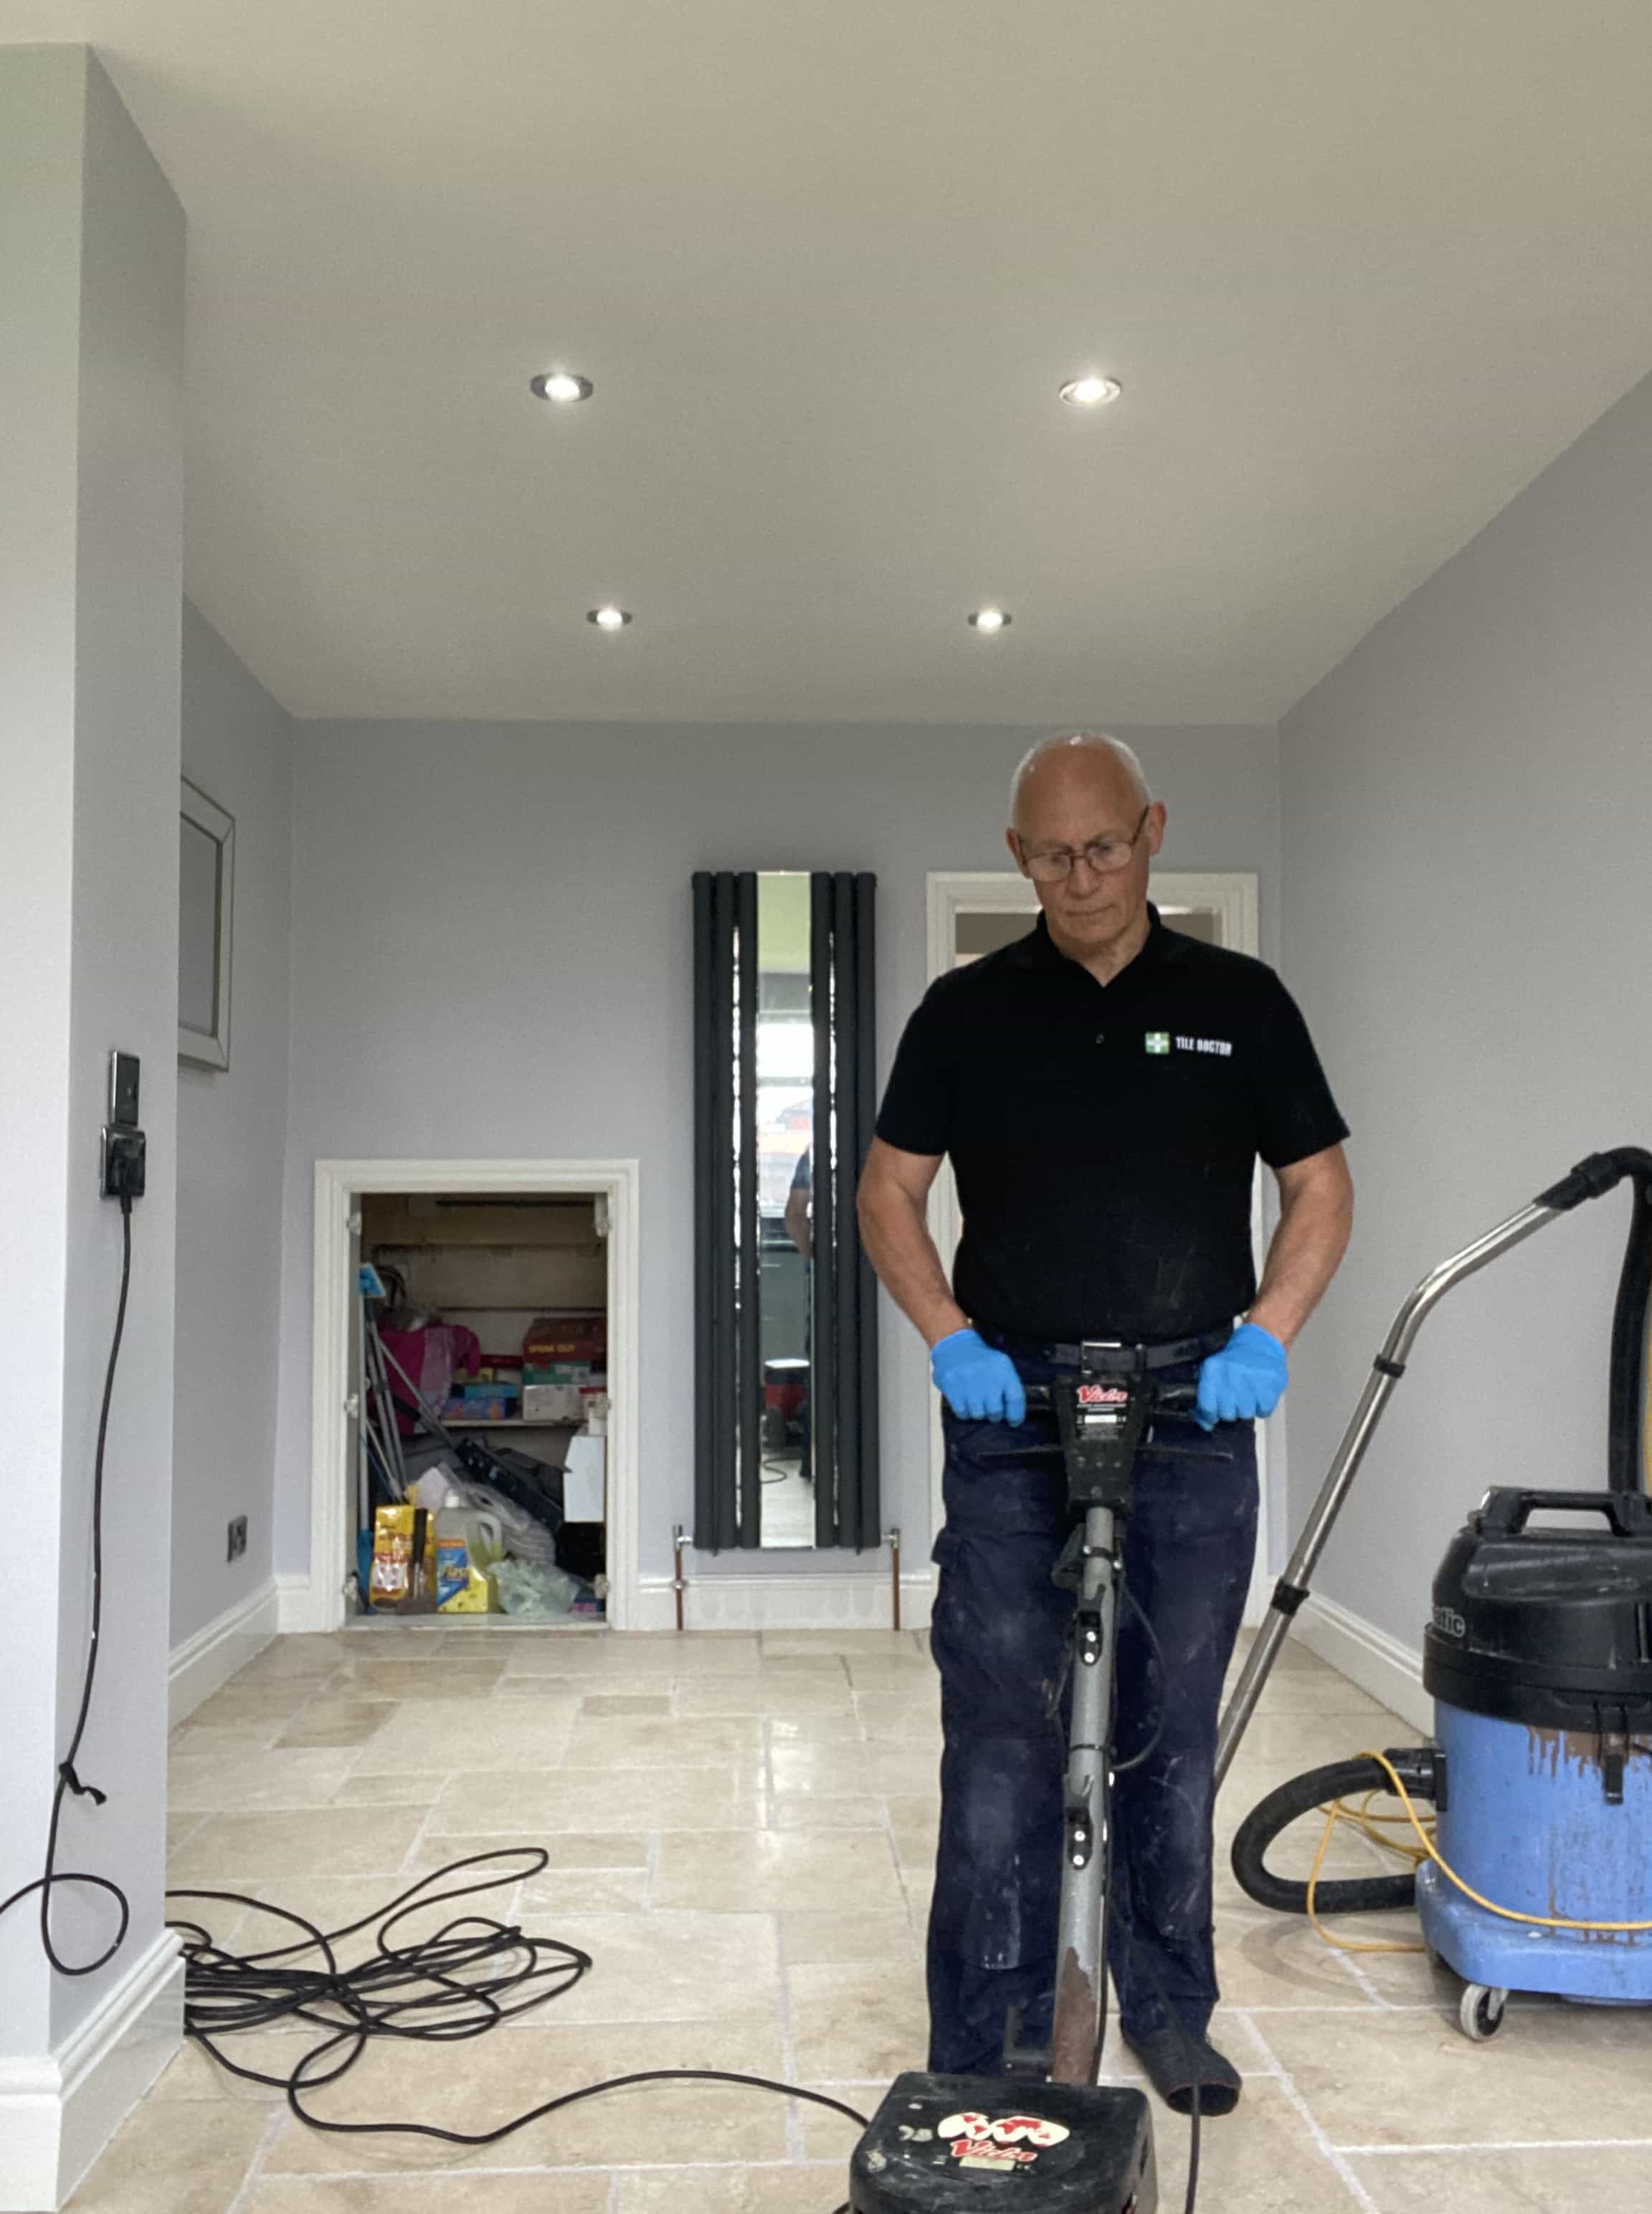
Limestone Floor After Cleaning and Polishing Colne Limestone Floor After Cleaning and Polishing Colne

The floor looked much cleaner and lighter once done and my client was very happy with the result and left the following comment on our review page:

“Thoroughly professional job from start to finish with fantastic results!”

Limestone Floor After Cleaning and Polishing Colne Limestone Floor After Cleaning and Polishing Colne

For aftercare I recommended using Tile Doctor Stone Soap for polished stone floors like this, it is a gentle effective cleaner that’s ideal for cleaning sealed floors and helps to maintain the patina.

Limestone Floor After Cleaning and Polishing Colne


Professional Restoration of a Limestone Tiled Ground Floor in South Lancashire

Polishing and Sealing a Dull Limestone Tiled Floor in Colne Burnley Read More »

Travertine Hallway Floor Polishing Bolton

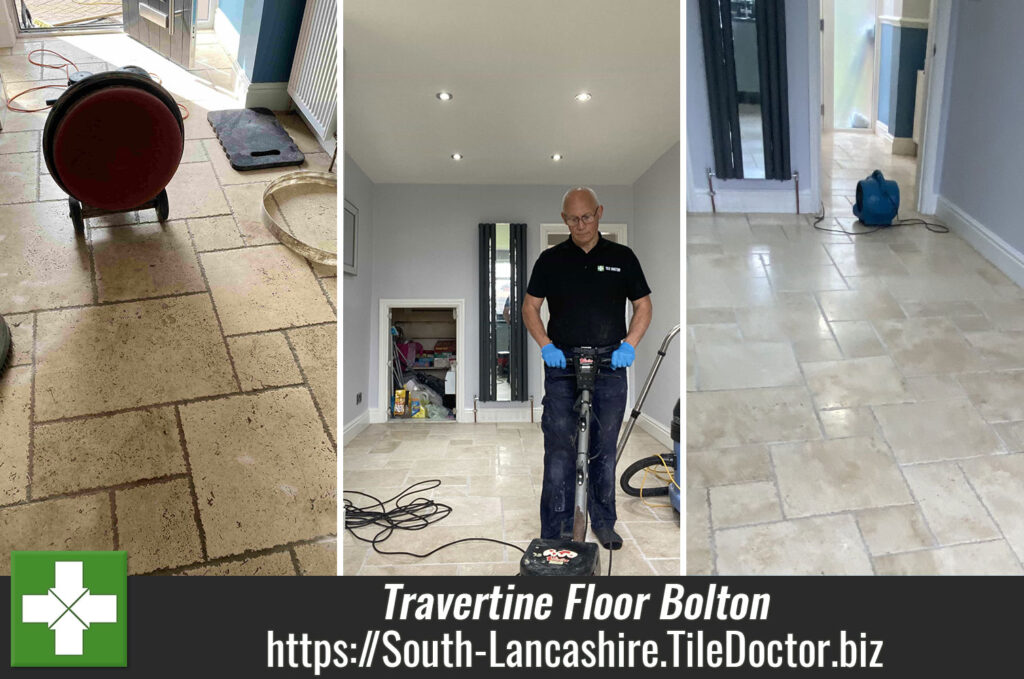
Renovating Multiple Travertine Tiled Floors in Bolton

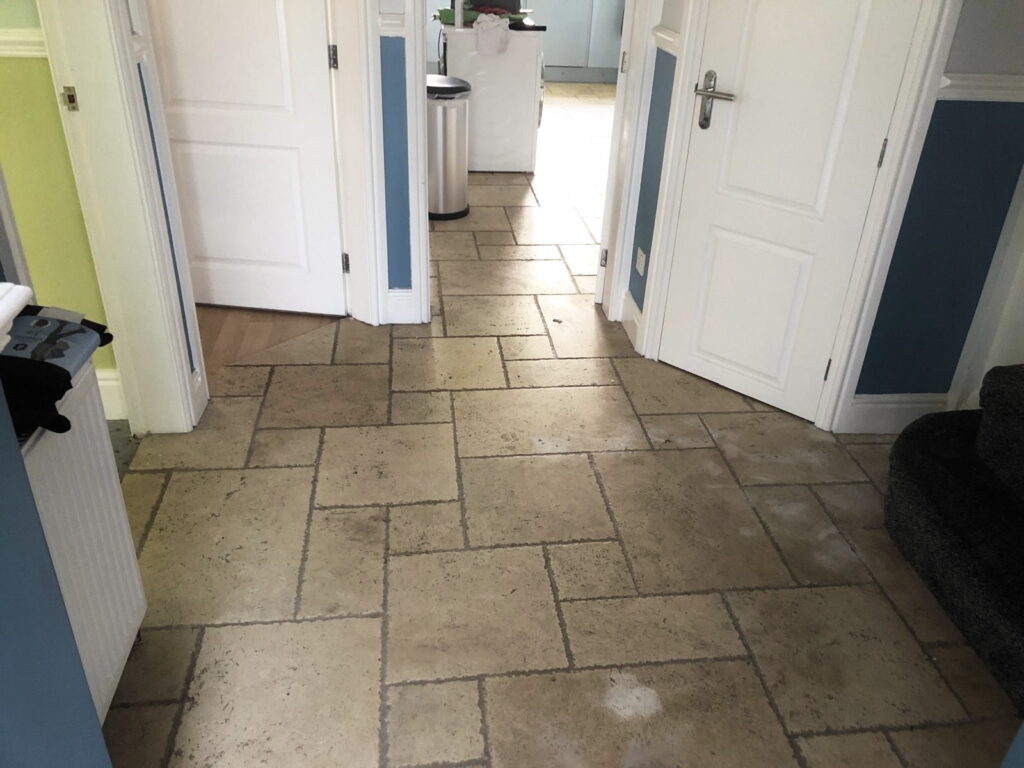
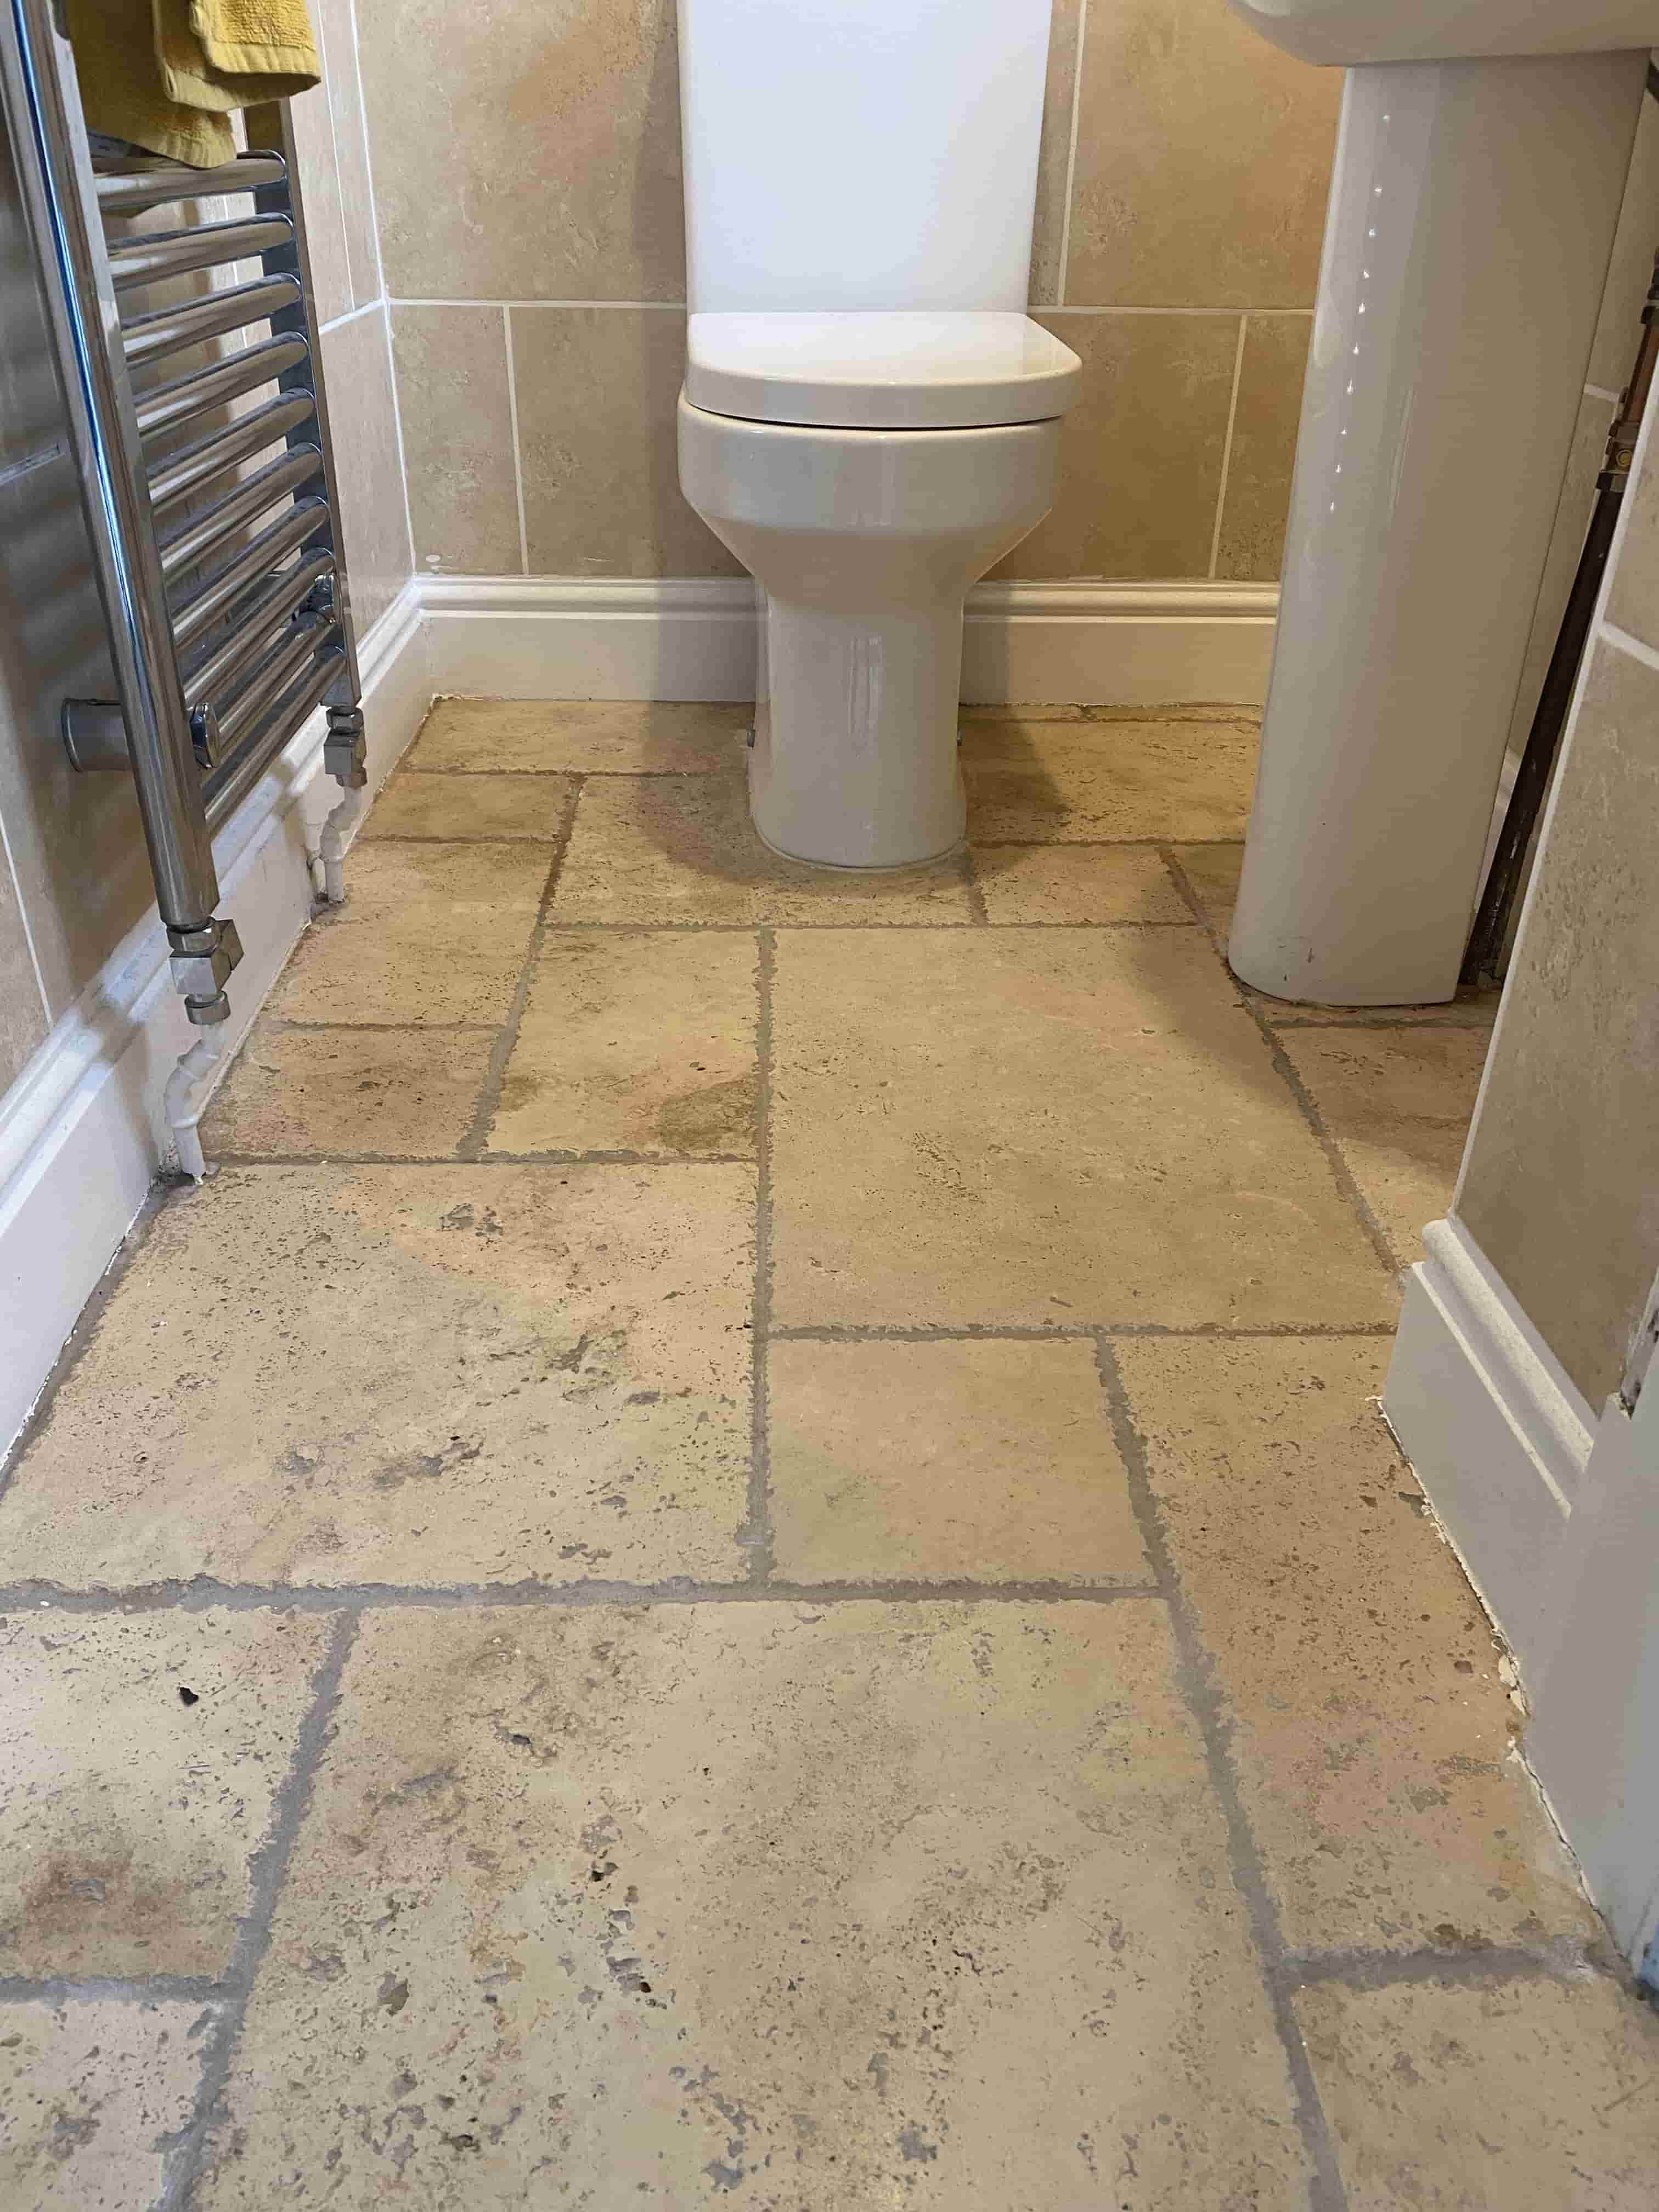
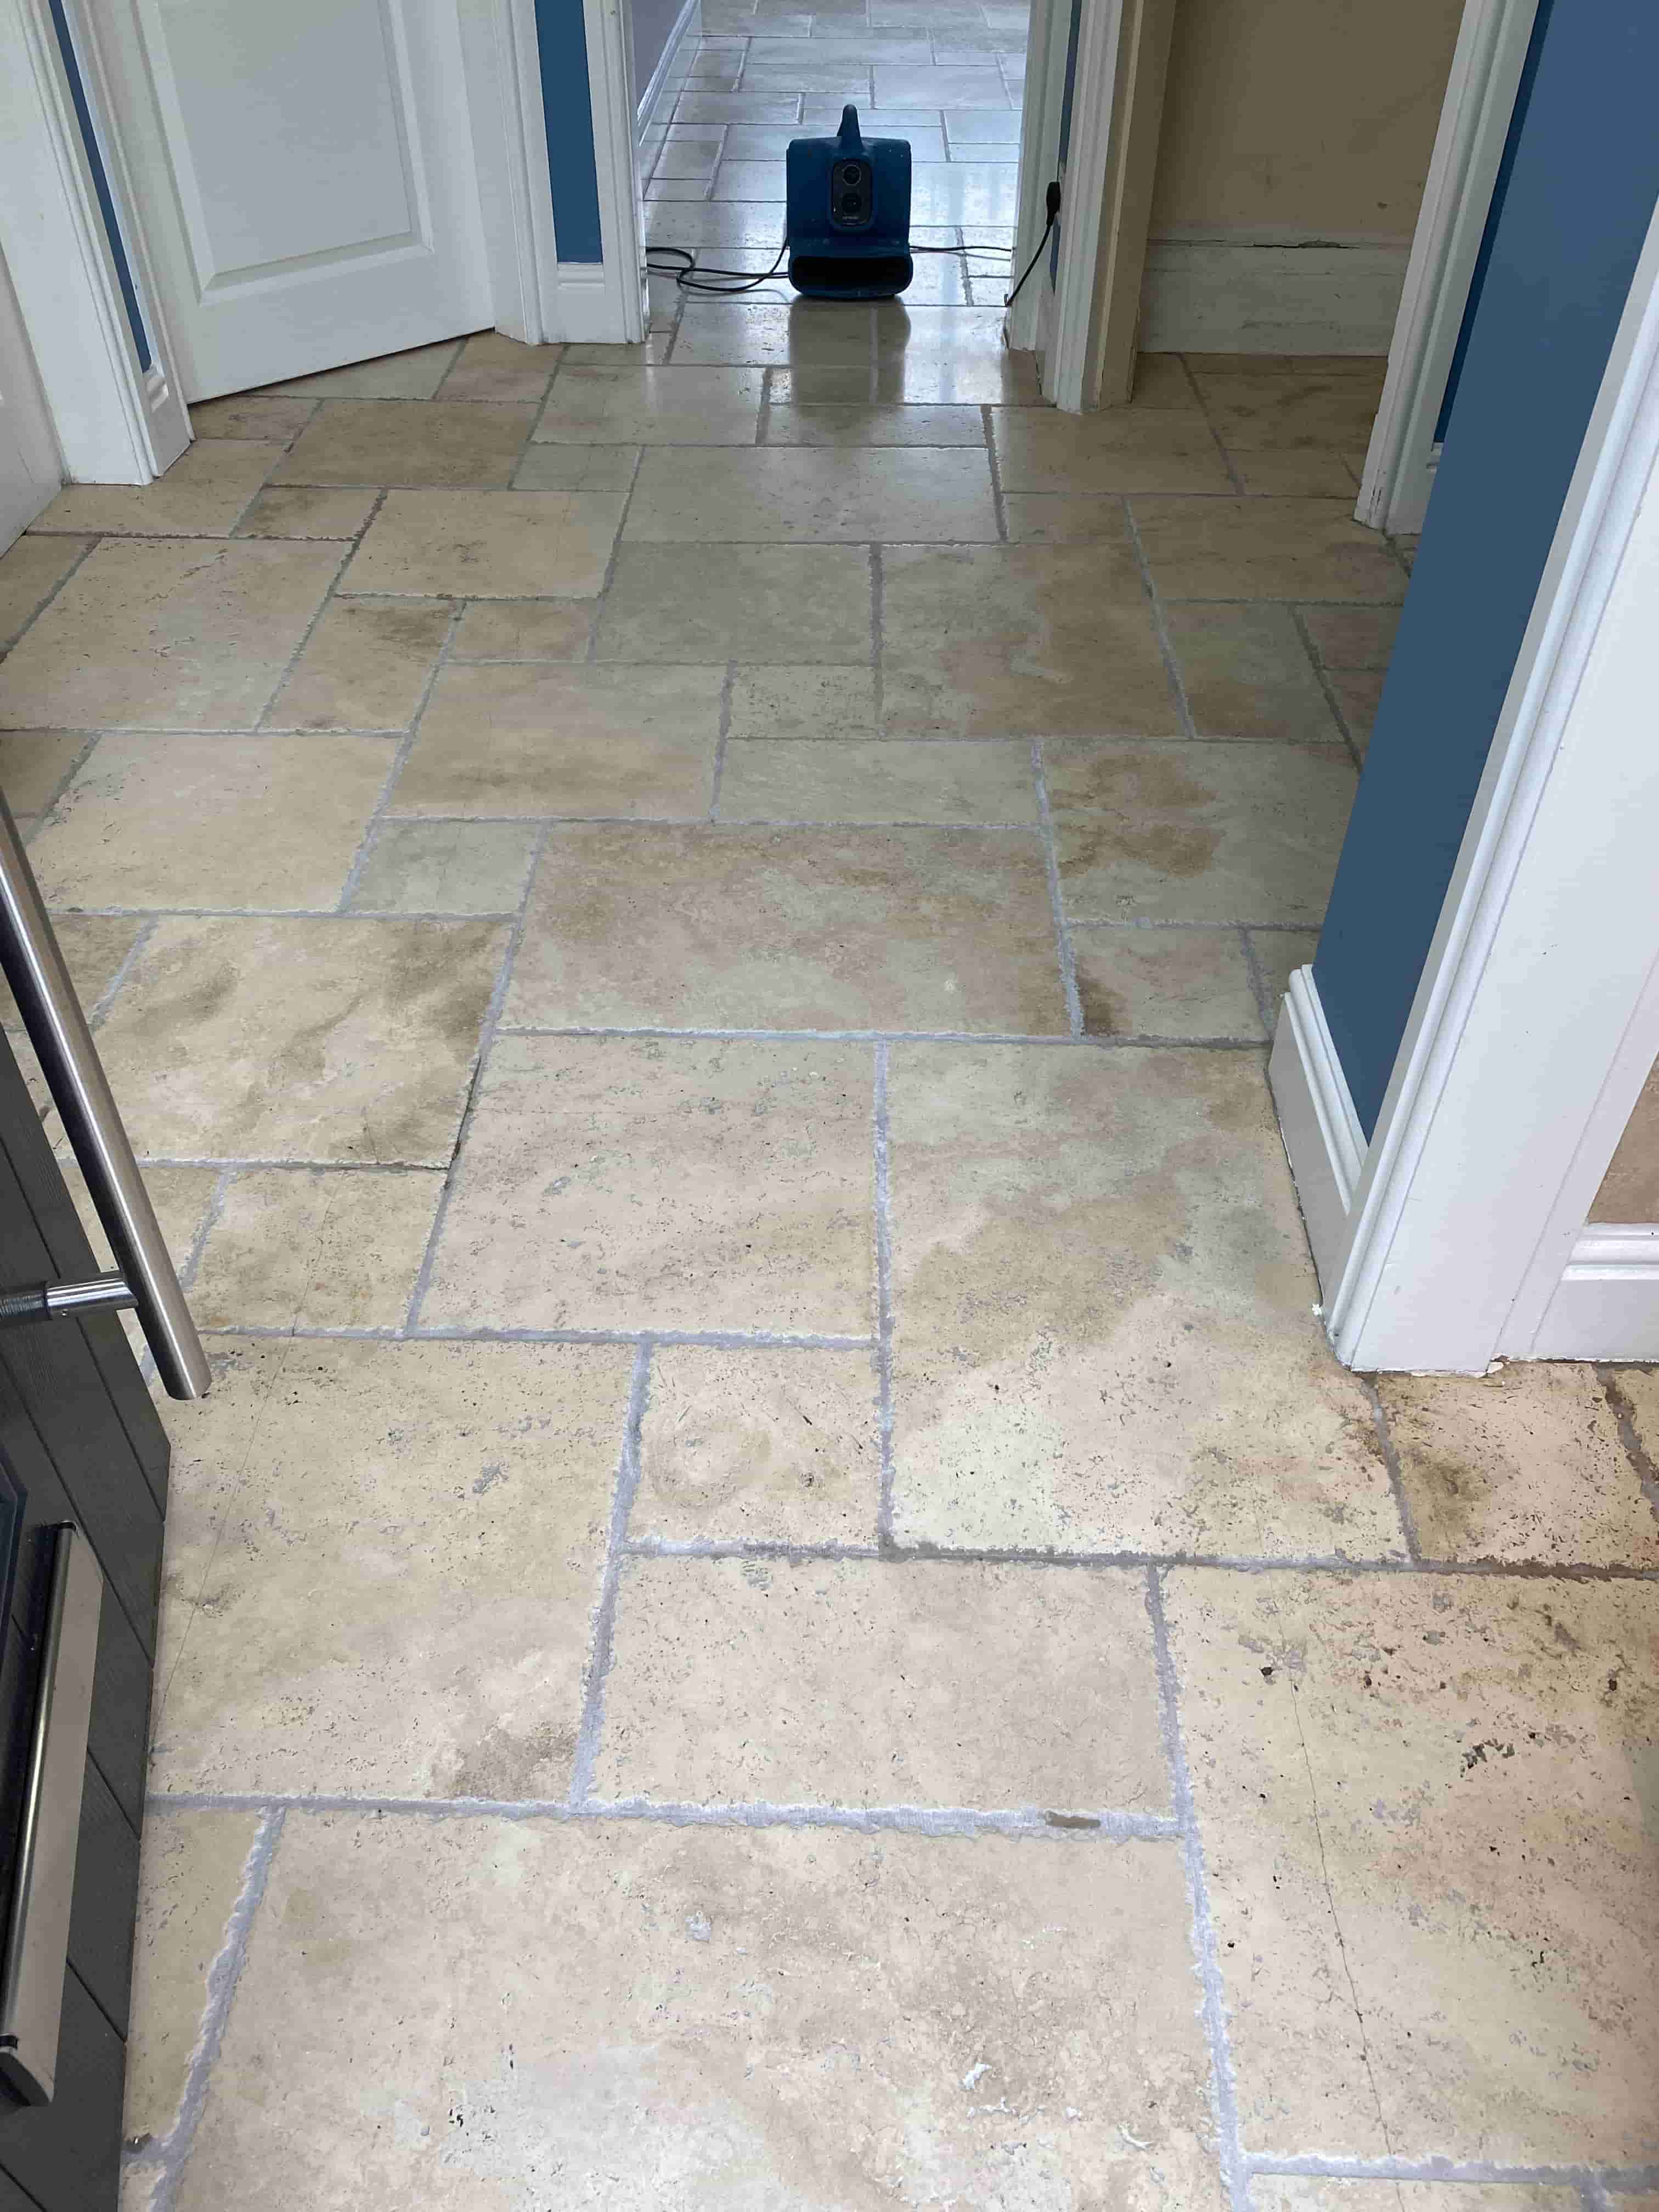
This homeowner from Bolton contacted us due to problems they were having with their Travertine tiled floor which ran through most of the ground floor. They had previously had some work done by a ‘cleaner’, but the results were not great. Hoping to do better they also had a go themselves without much improvement.

Travertine Hallway Floor Before Cleaning Bolton

They were ready to give up on the floor but due to the huge cost of replacement decided to look at alternatives. Researching the subject on-line they came across the reviews and transformative pictures on our website and decided to get in touch.

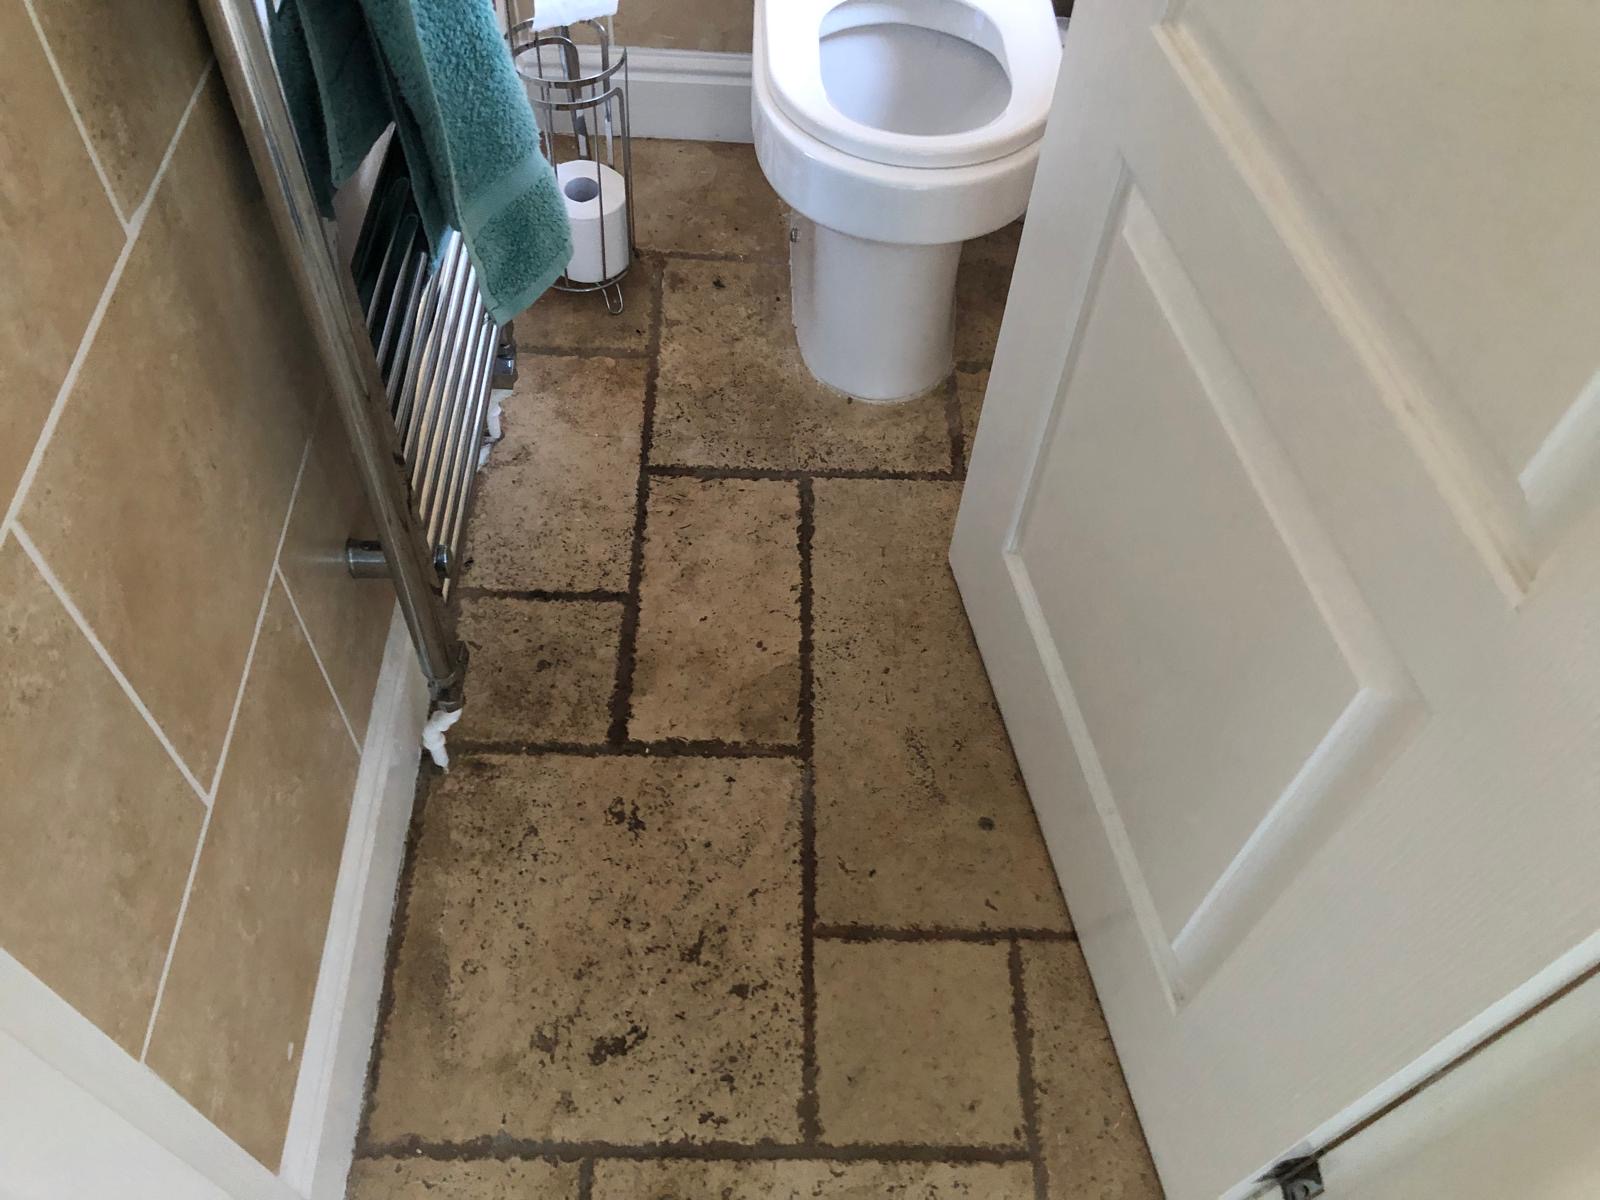
Travertine WC Floor Before Cleaning Bolton

I paid a visit to the property to survey the floor and could see the Travertine had clearly had a lot of unknown treatments in the past. Having assessed the floor I came up with a comprehensive plan that would restore the appearance of the travertine and grout. Happy with my quote we agreed a date for the work to start.

Travertine Hallway Floor Before Cleaning Bolton

Deep Cleaning Travertine Tiles

The first step was to apply a strong dilution of Tile Doctor Remove and Go and left it to soak for ten minutes before working it in to the stone using a 240-grit carbide brush. Once done the floor was rinsed with water and the soiling extracted using a wet vacuum. I had to repeat this process on stubborn areas but gradually the floor was stripped of old sealers and marks leaving it clean.

Travertine Hallway Floor Before Cleaning Setting up Bolton

To deal with the grout I applied Tile Doctor Pro-Clean and left it to dwell for fifteen minutes to give it time to breakdown the soils. It was then scrubbed into the grout lines by hand using a stiff brush. The floor was then rinsed again, and the waste removed.

With the floor clean of dirt, it became apparent some of the dirt had masked cracks and holes in the stone. So, although this was not listed on the quote, I spent time filling them in to enhance the overall finish.

Work then moved onto burnishing the Travertine to restore its polished appearance. This starts with the application of a coarse 400-grit pad. Using water to lubricate the pad as its run over each tile several times to give the stone a very deep clean. The floor was then rinsed and extracted, before moving onto the finer 800-grit and 1500-grit pads which start building the polish on the stone.

The floor was left to dry off overnight and the next the burnishing process continued using a very fine 3000-grit pad which is applied dry to the floor using only a little water sprayed onto the tile. This leaves a lovely, honed finish on the stone.

Travertine Hallway Floor During Dry Burnishing Bolton Travertine WC Floor After Cleaning Bolton

Sealing a Travertine Tiled Kitchen, Utility, WC and Hallway

To seal the stone a coat of Tile Doctor Ultra Seal was applied to retain the light colour the client liked and cloth off before applying a White Pad to remove any excess sealer and further bring up the polished appearance of the Travertine. Ultra-Seal is an impregnator that soaks into the pores of the stone adding protection from within, it’s also a natural look sealer that is almost invisible and doesn’t darken the colour of the stone.

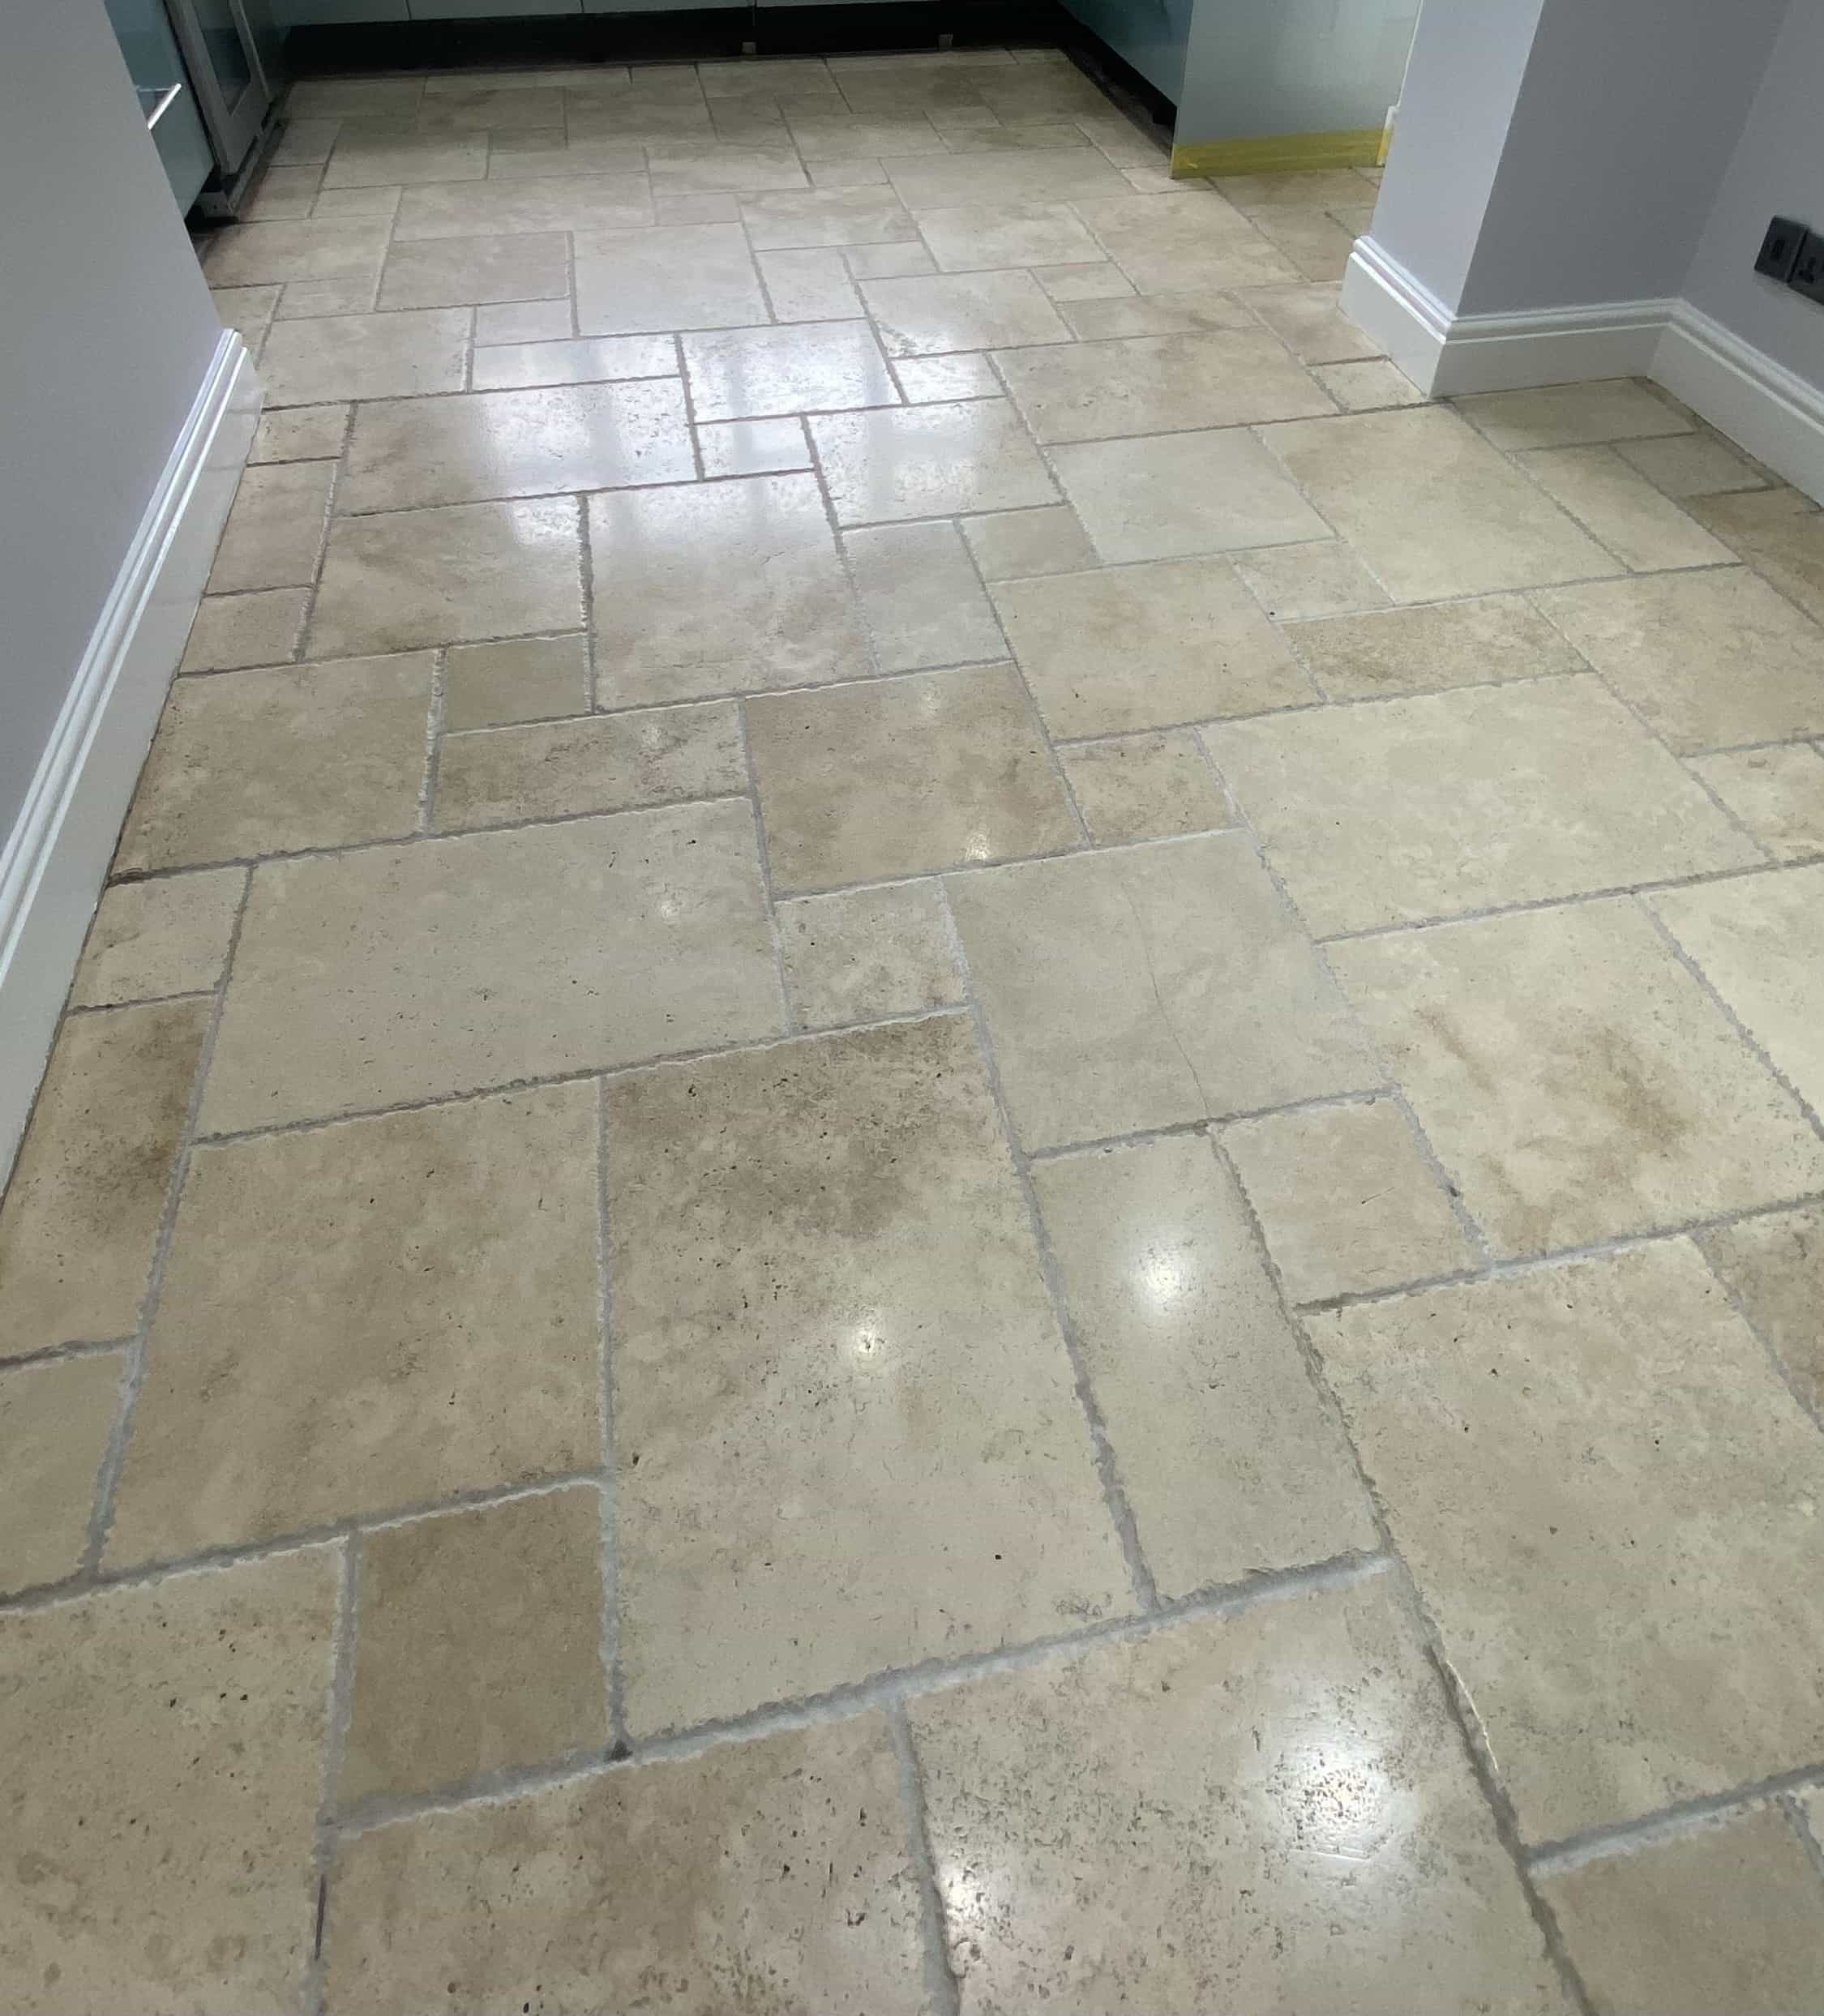
Travertine Hallway Floor After Sealing Bolton

The process transformed the appearance of the floor and my client was delighted. So much so they left the following glowing review:

“Kevin contacted me and quoted for the job after I had sent him pictures of my Travertine Floor which needed deep cleaning and sealing. I confirmed I was happy with the quotation, and he sent me a list of products to purchase from the Tile Doctor which would be required to do the job. Kevin explained it could be a 2-3 day job dependant on how the floor reacted to the cleaning process. Kevin completed the work in 2 days and I am highly delighted with the result and I will be taking Kevins advice on keeping it clean with the products he left me. I would highly recommend Kevin and will be using him again in the coming years.”

Travertine Kitchen Floor After Renovation Bolton

For the aftercare cleaning of their polished stone floor, I recommended the use of Tile Doctor Stone Soap. It’s a gentle yet effective floor cleaning product with a formula that enhances the patina on the stone.


Professional Renovation of Travertine Floor Tiles in Greater Manchester

Renovating Multiple Travertine Tiled Floors in Bolton Read More »

Porcelain Tiled Plank Floor Leigh Grout Colouring

Planked Effect Porcelain Floor Renovated after Water Damage in Leigh

I was originally called to this home in Leigh to deep clean approx. 100m2 of porcelain floor tiles in the living area after recent works, but plans changed somewhat when I arrived.

Porcelain Tiled Plank Floor Leigh Before Renovation

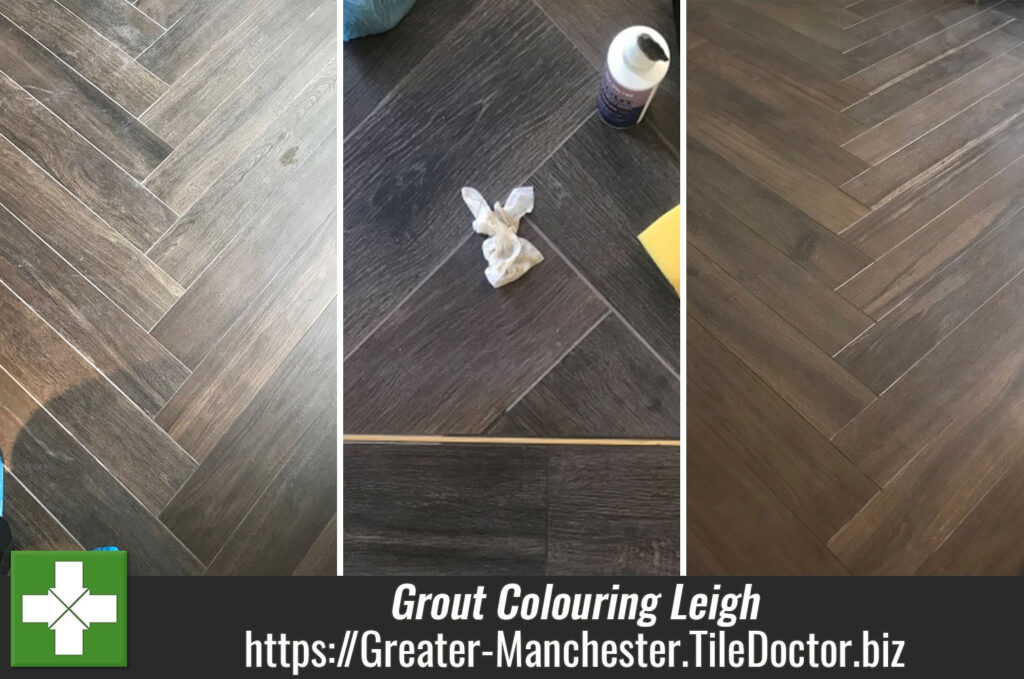
On my arrival the owners informed me that since my last visit to quote for cleaning the Porcelain floor a leak had come through the ceiling. This had left the previously dark grout in the textured ‘plank’ effect porcelain looking washed out and, leaving the floor in need of a refresh. I strongly suspect it wasn’t the leak that caused the problem, but the use of strong cleaning products used afterwards to clean up the mess, a lot of these cleaning products contain bleach, and this can wash the colour out of grout.

Out of interest the main issue we encounter with this type of flooring is grout haze, which occurs when the installer doesn’t manage to remove all the grout. This results in a thin film of grout on the surface which detracts from the final appearance. This probably happens with all installations but is certainly very evident on porcelain. The solution is to give the floor an acid wash using Tile Doctor Grout Clean Up, but most tilers don’t bother.

After discussion it was agreed to re-focus the time, we had available on the grout. However, after a deep clean it became clear the grout would need recolouring to look it’s best.

Grout Colouring Porcelain Floor Tiles with Chocolate Grout Colouring

Applying a Tile Doctor Grout Colourant in Chocolate colour was the ideal solution and after an urgent call to Tile Doctor HQ I set up a delivery to ensure it would be with us the next morning.

In the meantime, I continued the preparation of the grout and cleaning of the tiles using Tile Doctor Grout Clean-up which not only removes the grout haze but will also etch the surface of the grout to ensure a superior bond with the colourant.

That afternoon we also discussed the high gloss porcelain floor in the hallway, the owners had spent a lot of time polishing it themselves since installation and were not completely happy with it. I setup a floor buffer fitted with a 3000-grit pad and dry burnished a small section in the hallway. The difference was obvious, and they could see an immediate improvement, as a result they decided to rebook me to do a day polishing as well once the living room was completed.

I returned on day two to find the colourant had arrived and so started the process of recolouring the grout with the chocolate colourant. This is a straightforward process but very time consuming as with these thin planks there were a lot of grout lines to cover.

Afterwards the tiles were gently buffed with a White pad before leaving to dry. The owners were very pleased with the result commenting we had done a “brilliant job in the front room.” Later he added the following feedback:

“Kevin was excellent and did a fantastic job at the house.”
Porcelain Tiled Plank Floor Leigh After Grout Colouring

They also booked us in to do the polish on the next available date, but I’ll discuss that in a separate post.

Porcelain Tiled Plank Floor Leigh After Grout Colouring Porcelain Tiled Plank Floor Leigh After Grout Colouring


Professional Restoration of a Porcelain Planked Tiled Living Area in Greater Manchester

Planked Effect Porcelain Floor Renovated after Water Damage in Leigh Read More »

Quarry Tile Floor Grout Before After Restoration Bury

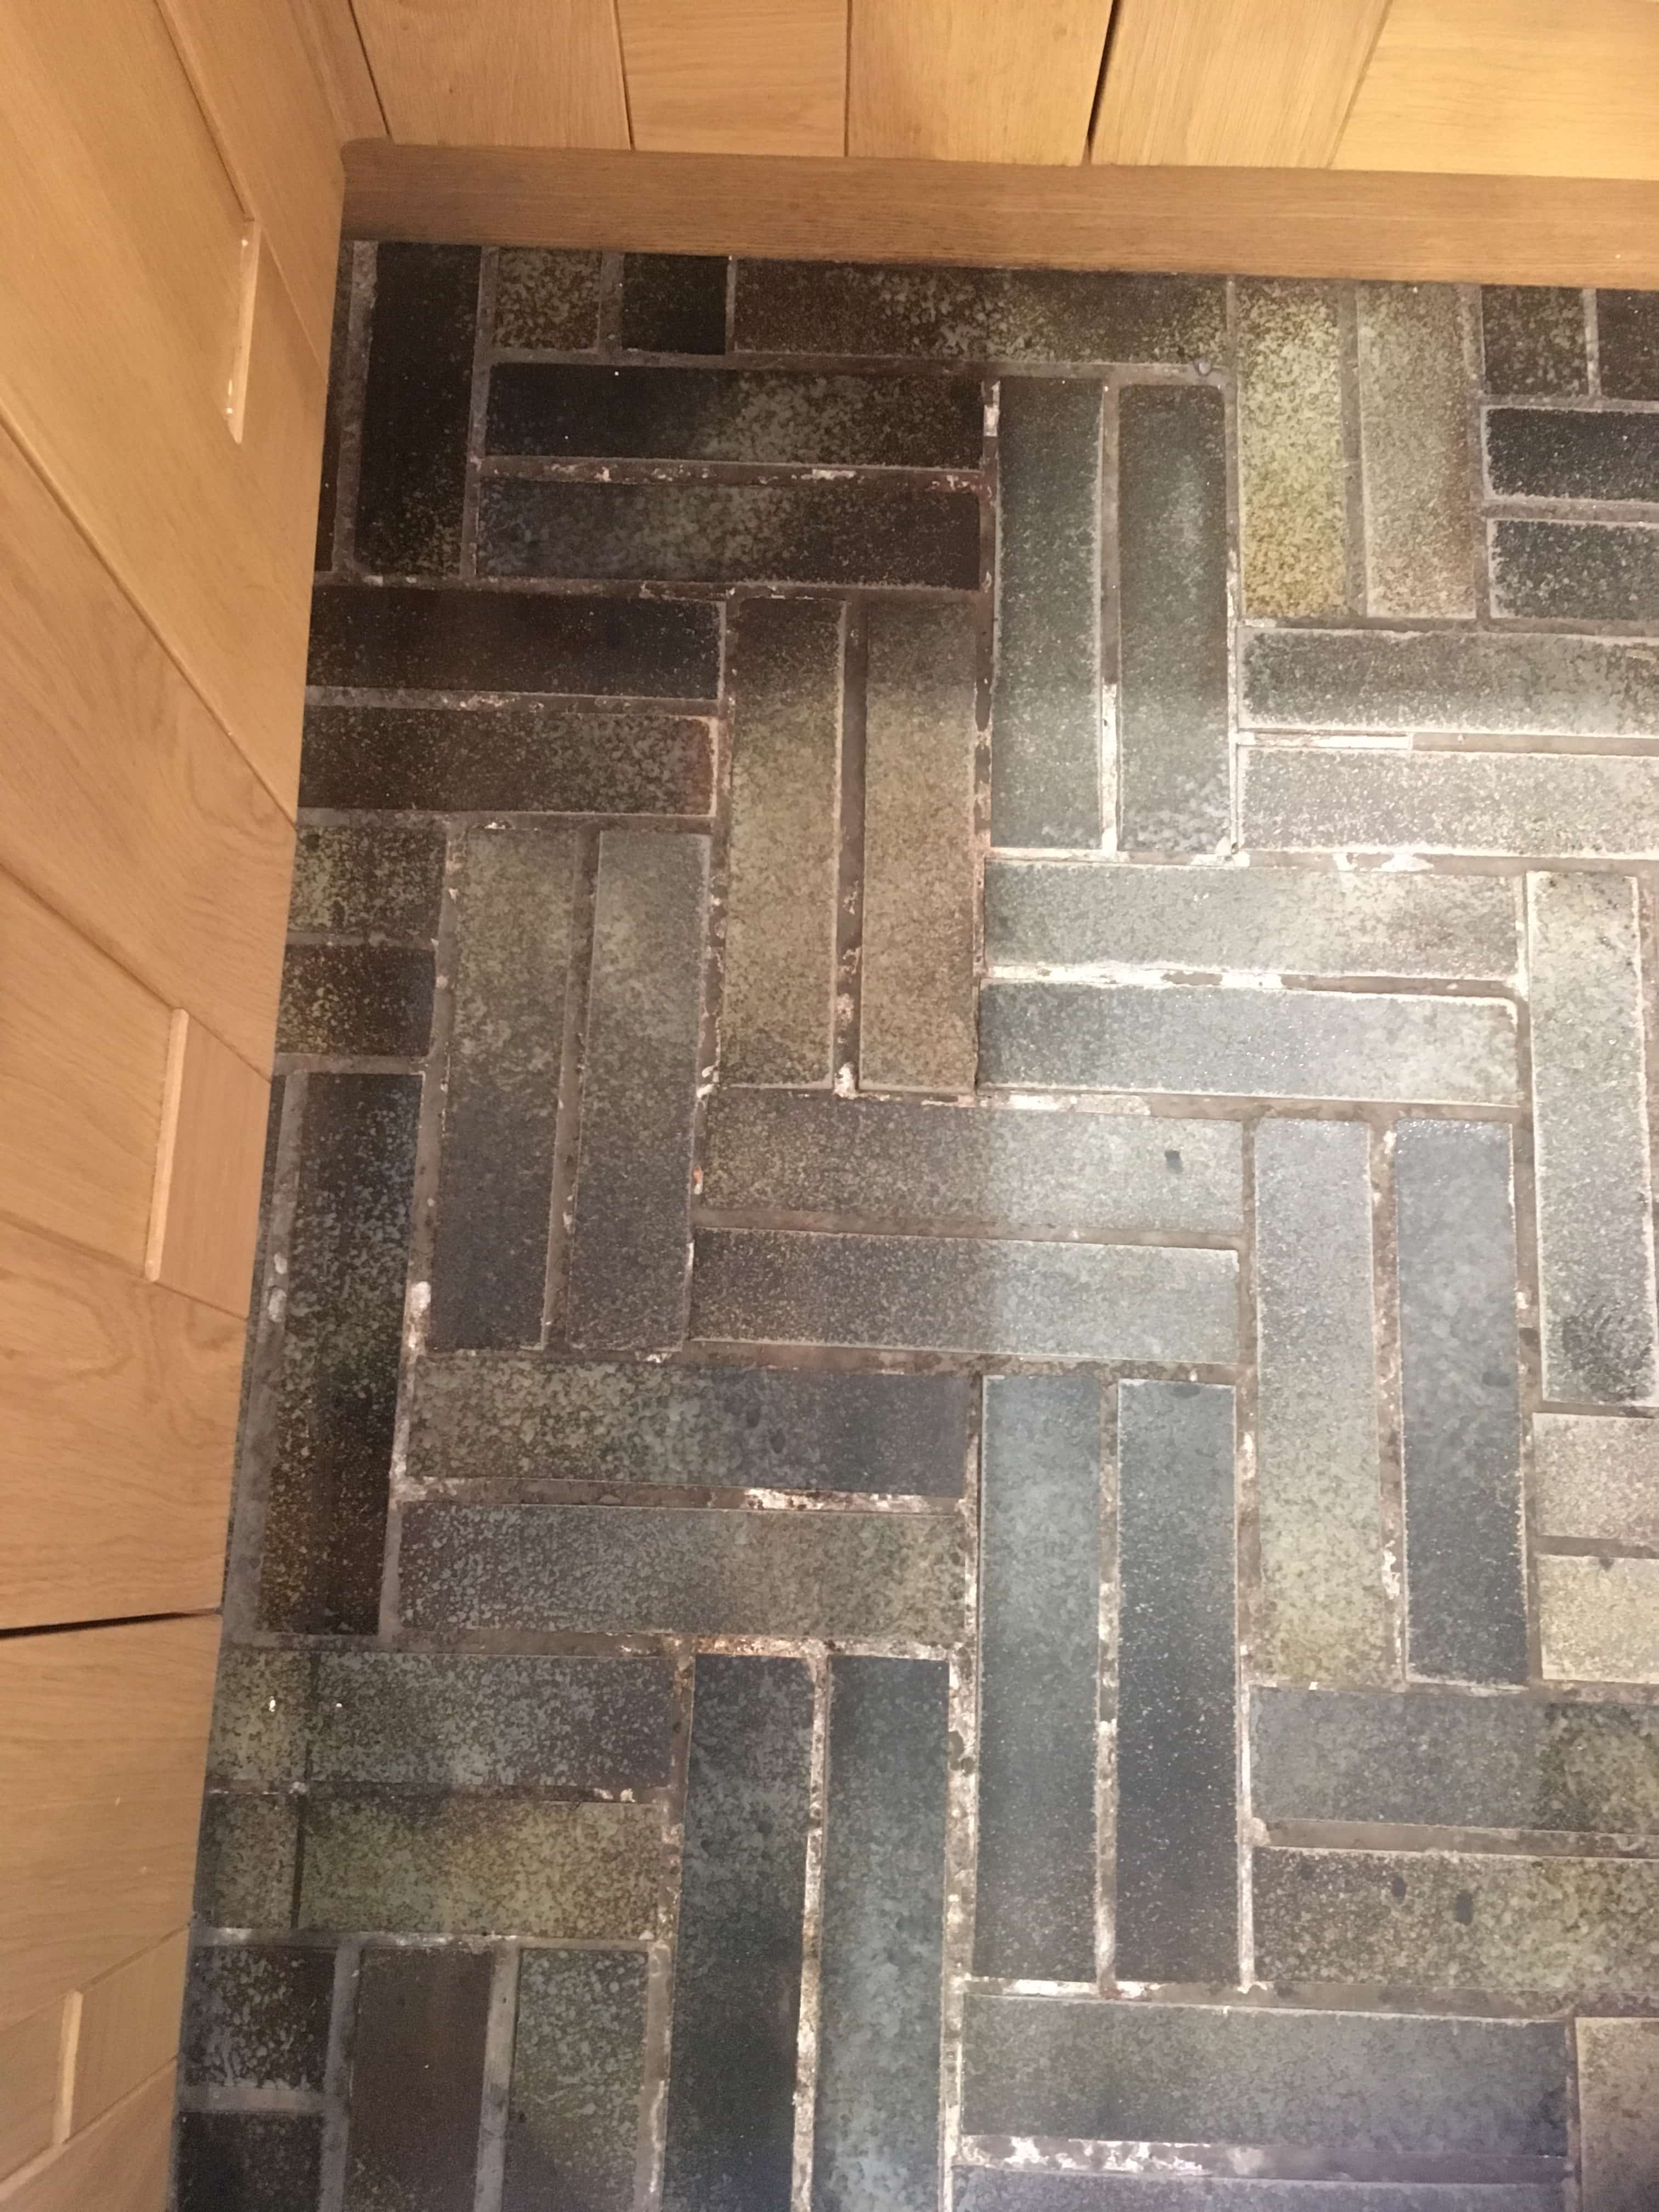
Lime Mortar Grout Renovated in 300 Year-Old Cottage Bury

We received an unusual request from the owner of an old cottage in Bury who was unhappy with the state of the grouting in their Kitchen. The customer advised us that the floor was very old and originally grouted with a lime mortar also that they had been in touch with several companies before contacting us including tilers and masons and none of them was interested.

Intrigued I paid the customer a visit to survey the floor and work out the best way to renovate the grout. The cottage turned out to be three hundred years old and the owner wanted to keep the Quarry tiled floor which was laid in a Herringbone pattern and still in good condition as a period feature as it complemented the rustic look of the cottage.

Lime Mortar Grout Before Restoration Bury Cottage

After testing the floor, I was able to confirm it was indeed Lime Mortar which was historically used on walls and natural stone floors until the 19th century when it was replaced by cement. The mortar was now grubby and had shrunk in places where it had then been topped up with conventual grout resulting in a patchy appearance.

Lime Mortar Grout Before Restoration Bury Cottage

I felt simply cleaning the grout wouldn’t resolve the irregular look so my suggestion was to use a grout colourant that would sit on the surface of the grout and provide a uniform appearance. I must point out that the Grout Colourants used by Tile Doctor are not like grout pens you see on home make over shows, they are much more effective.

Applying a Grout Colourant to Lime Mortar

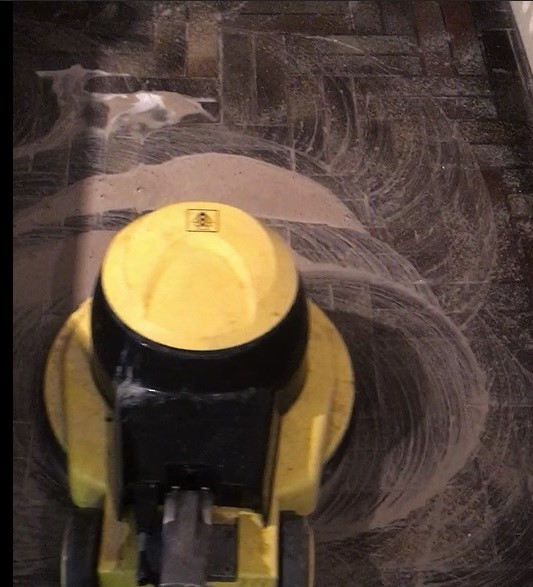
Happy to go with my recommendation I set about preparing and cleaning the Quarry tile and mortar with a strong dilution of Tile Doctor Pro-Clean. This is sprayed onto the floor and then scrubbed in with a buffing machine fitted with a scrubbing pad. This action turns the cleaning solution into a slurry as the dirt is lifted out of the floor which is then rinsed off with water and extracted with a wet vacuum. Tile Doctor do sell a Grout Colourant Pre-Treater product that has been especially designed for this purpose however it’s slightly acidic and so not something I would recommend for use on lime mortar.

Lime Mortar Grout During Cleaning Bury Cottage

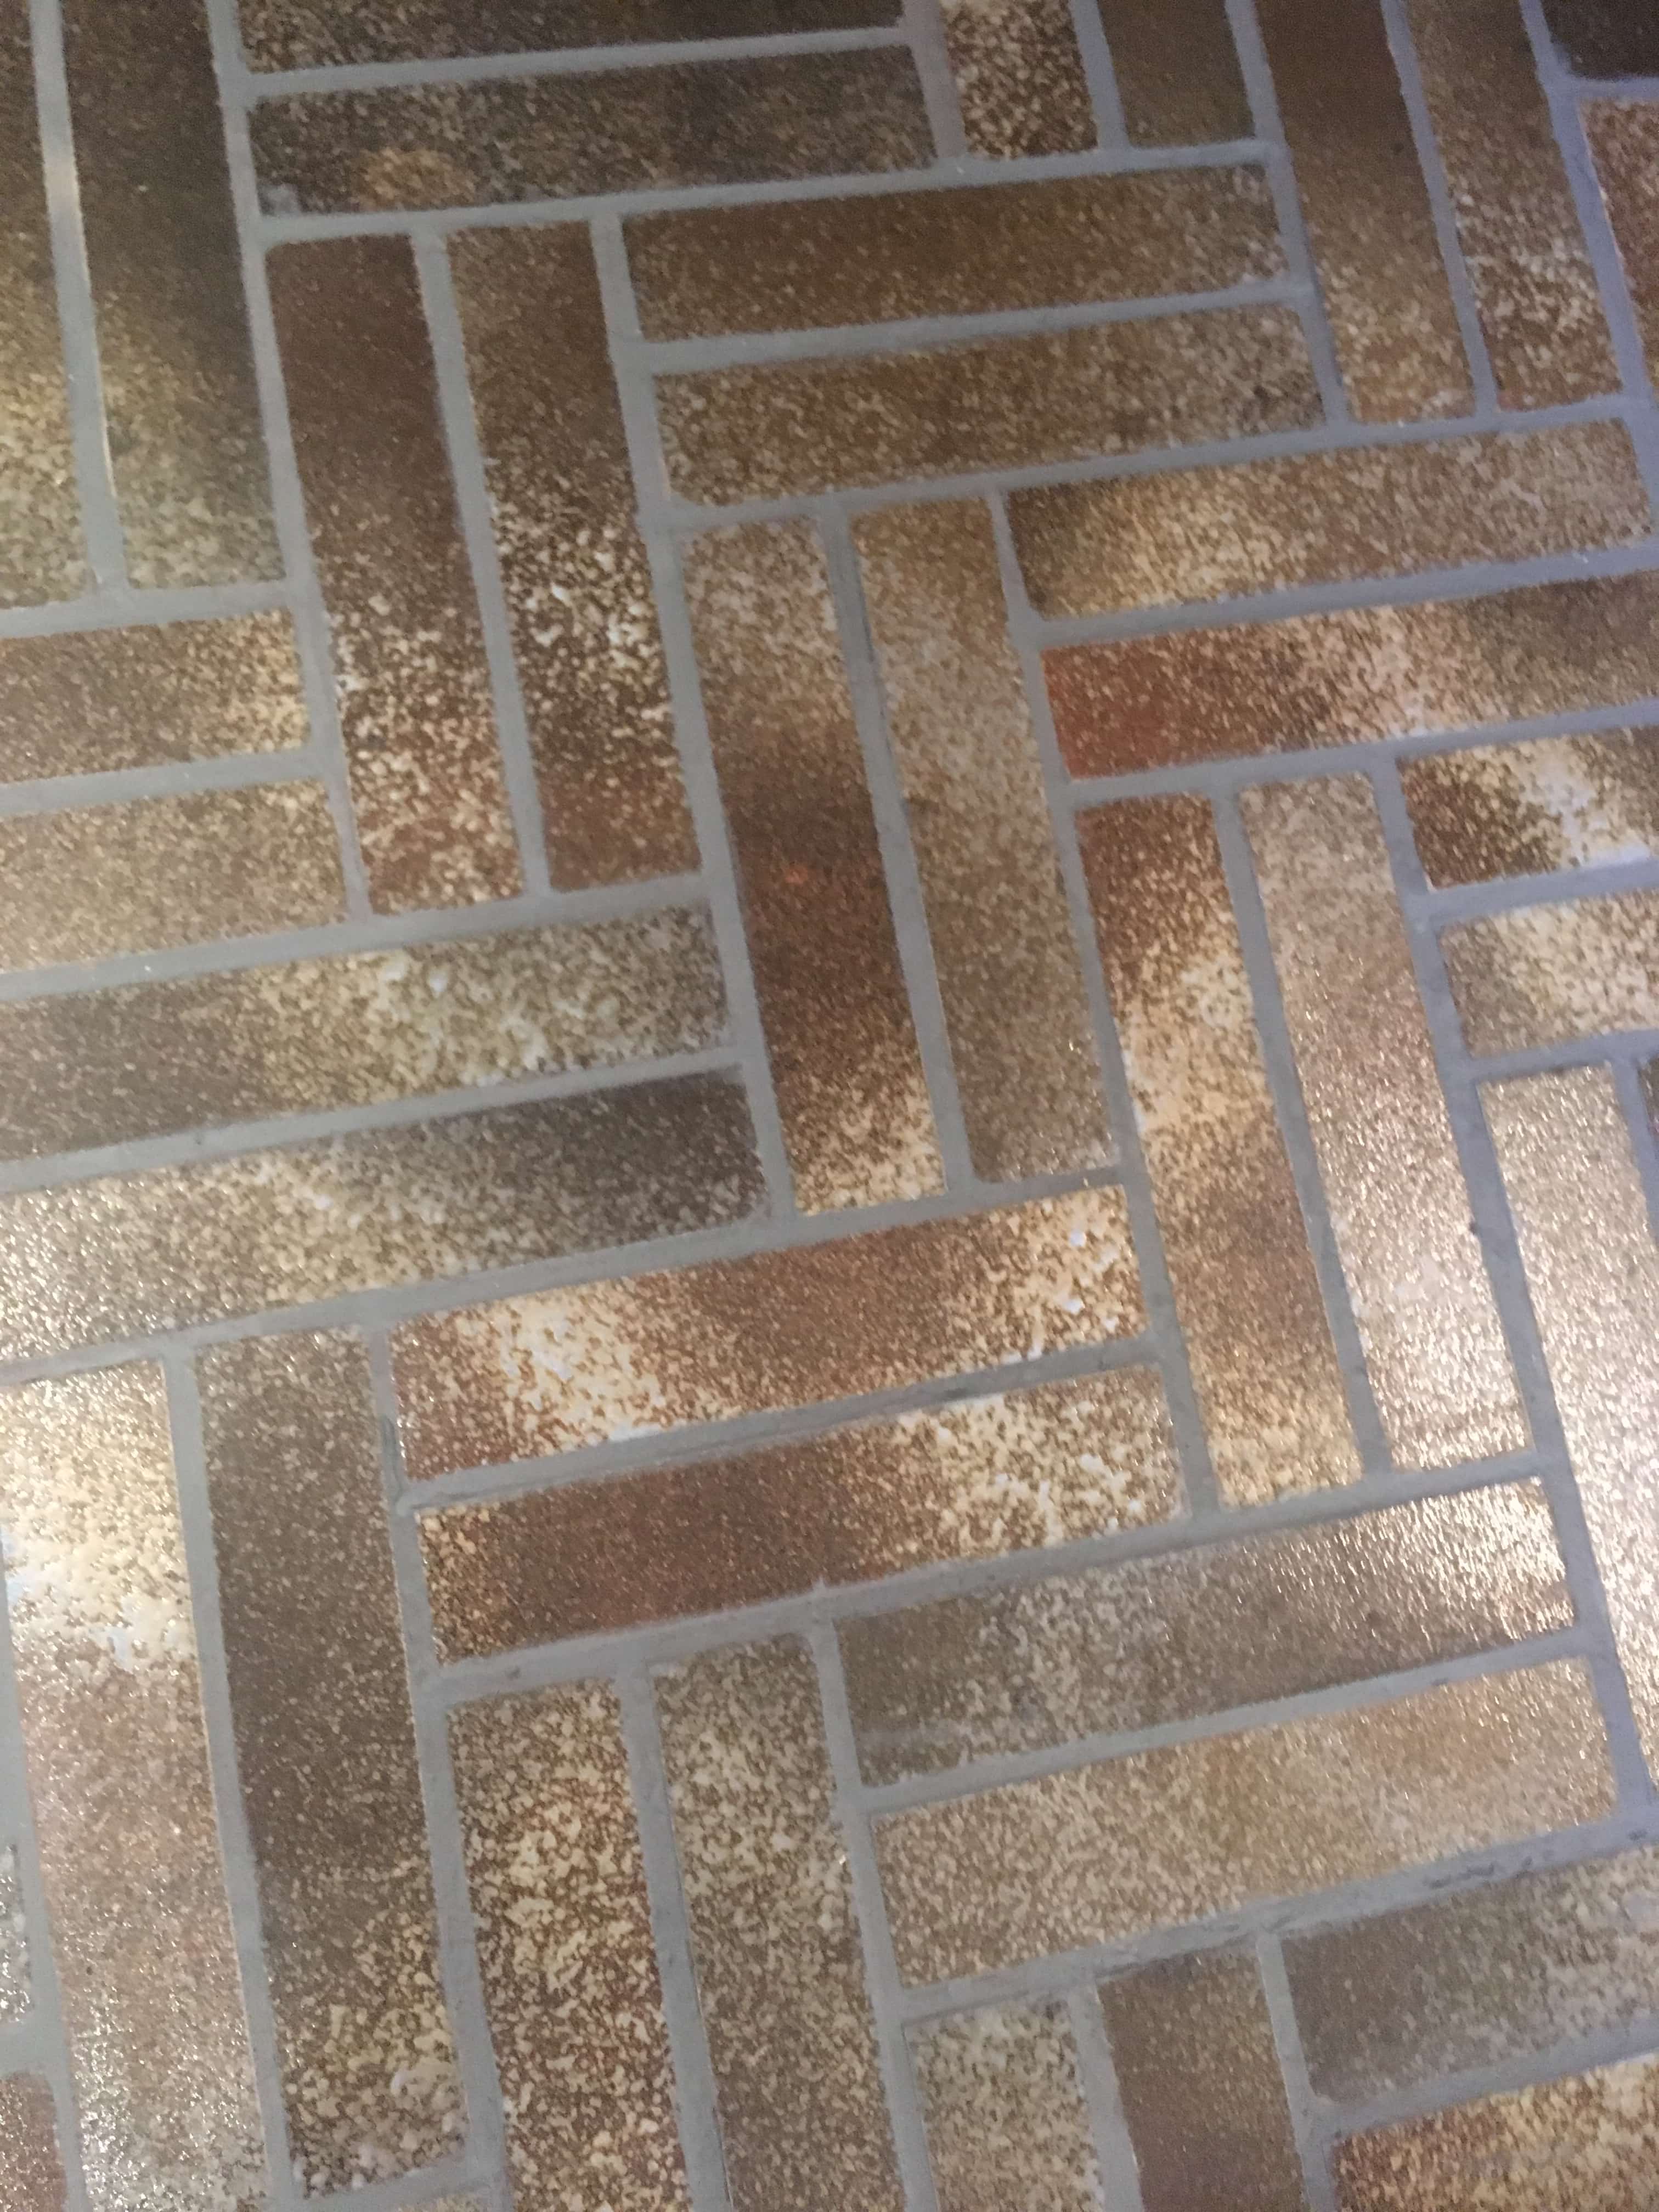
Once the floor had dried, I started with the grout colouring which is painted onto the surface with a small brush. Two thin coats of natural grey colourant were applied and any excess that came into contact with the quarry tile was quickly wiped off with a cloth. The product dries within two hours but takes twenty-four hours to fully harden.

Lime Mortar Grout After Restoration Bury Cottage

I think you will agree the results speak for themselves and made the area look nearly new! My client was certainly impressed and left the following feedback which says it all:

Kamila was professional, courteous and very hard working. I am delighted by the job done on a very old difficult tiled floor. I would not hesitate to use Tile Doctor again or in recommending them to a friend. – Mrs Law, Bury


Lime Mortar Floor Grout Renovated in Greater Manchester

Lime Mortar Grout Renovated in 300 Year-Old Cottage Bury Read More »
Cleaning Shower Cubicle Grout in Walshaw

Cleaning Shower Cubicle Grout in Walshaw

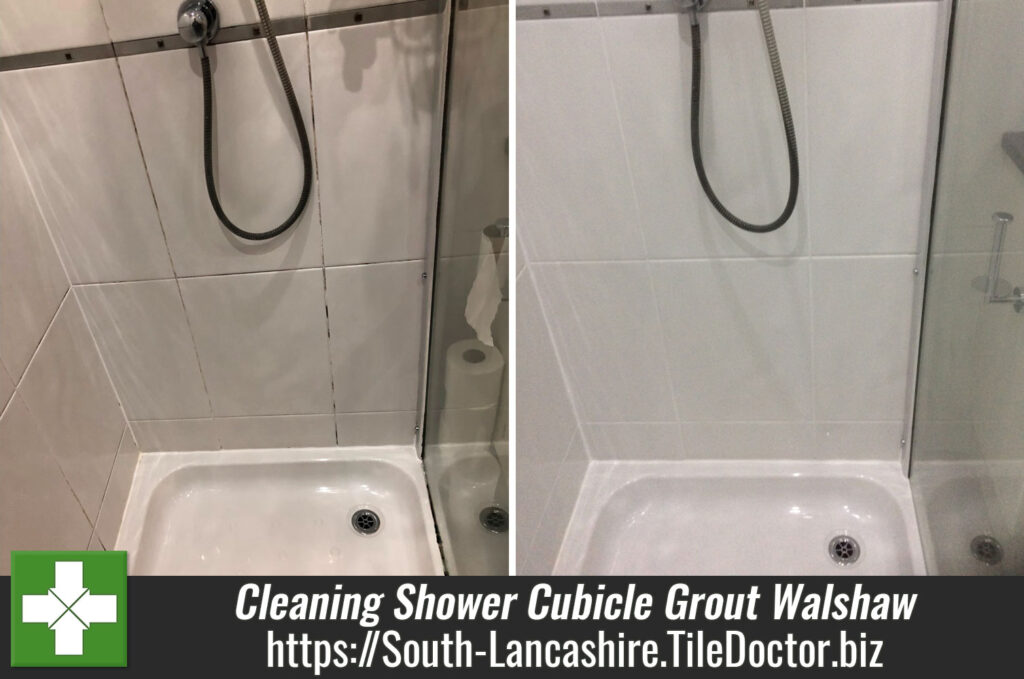
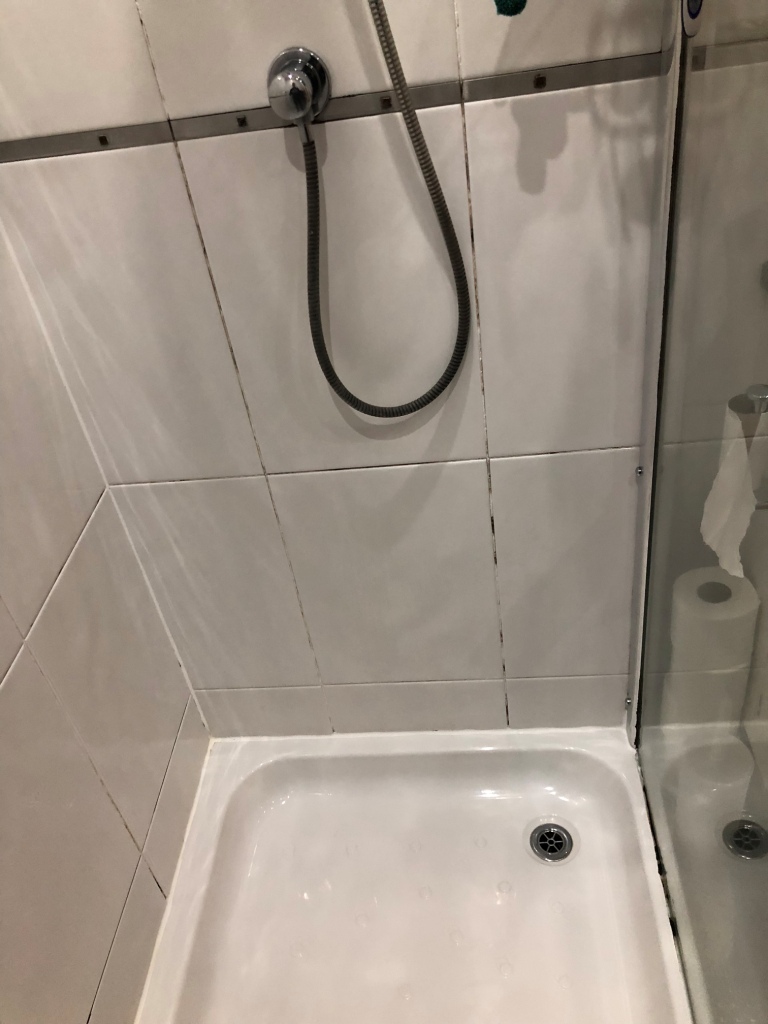
The photograph below is of a Ceramic Tiled Shower Cubicle at a house in the lovely village of Walshaw which is part of the Metropolitan Borough of Bury, near Tottington and Bury. Most of the grout had darkened and some of the grout had cracked and had fallen out, the silicone seal at the bottom of the shower had gone mouldy in places and would also need replacing.

I find mould is a common problem in bathrooms and more prevalent in smaller bathrooms where the hot air and steam are unable to dissipate as easily creating the ideal environment for mould to grow. The solution is improved ventilation; alternatively you can keep on top of the situation by regular cleaning with Tile Doctor Duo Clean.

Ceramic Tiled Shower Grout Before Restoration Walshaw

Tile and Grout Cleaning

To tackle this installation I started by spraying the Tile and Grout down with Tile Doctor Duo-Clean, let it soak in for about ten minutes and then scrubbed it in by hand with a stiff brush followed by rinsing with water. This made a big improvement however there were still areas where the grout was still showing evidence of staining and would need a grout colourant applied to make it look like new again.

Next step however was to rake out the areas of grout that had crumbled and replace with new. Being a Tile Doctor this is something we are very familiar with and once the grout had dried I was able to move onto colouring.

Normally I would recommend using a Grout Colourant Pre-Treater before colouring however in this case I felt the scrub down I gave the grout with Duo-Clean would prepare the grout sufficiently and further preparation would not be necessary. The colourant is painted on using a small brush over the grout and any excess wiped off the ceramic tiles. The process makes a big difference to the look of a shower and the colourant provides a barrier over the grout making it easier to clean in future.

Last step was to strip out the silicone sealant between the shower wall and tray and replace with a new mould resistant sealant in white.

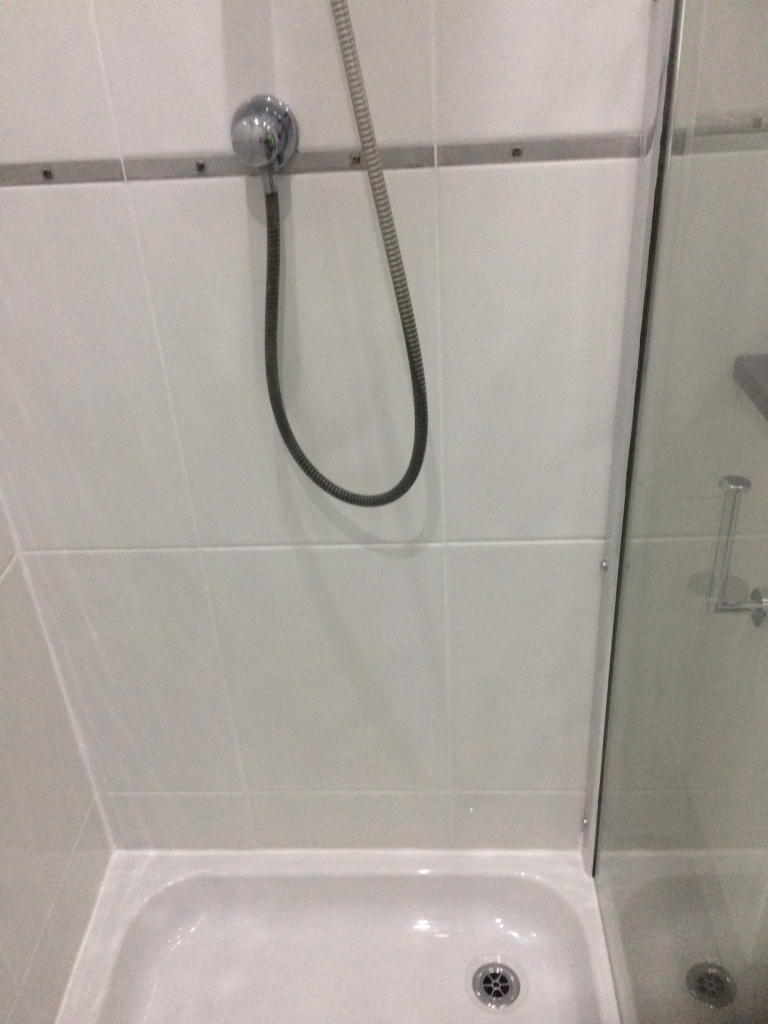
Ceramic Tiled Shower Grout After Restoration Walshaw
The shower cubicle was transformed and now looks as though it was recently installed.

Professional Shower Cubicle Renovation in South Lancashire

Cleaning Shower Cubicle Grout in Walshaw Read More »

Polishing and Sealing Travertine Tiles in Blackburn

Polishing and Sealing Travertine Tiles in Blackburn

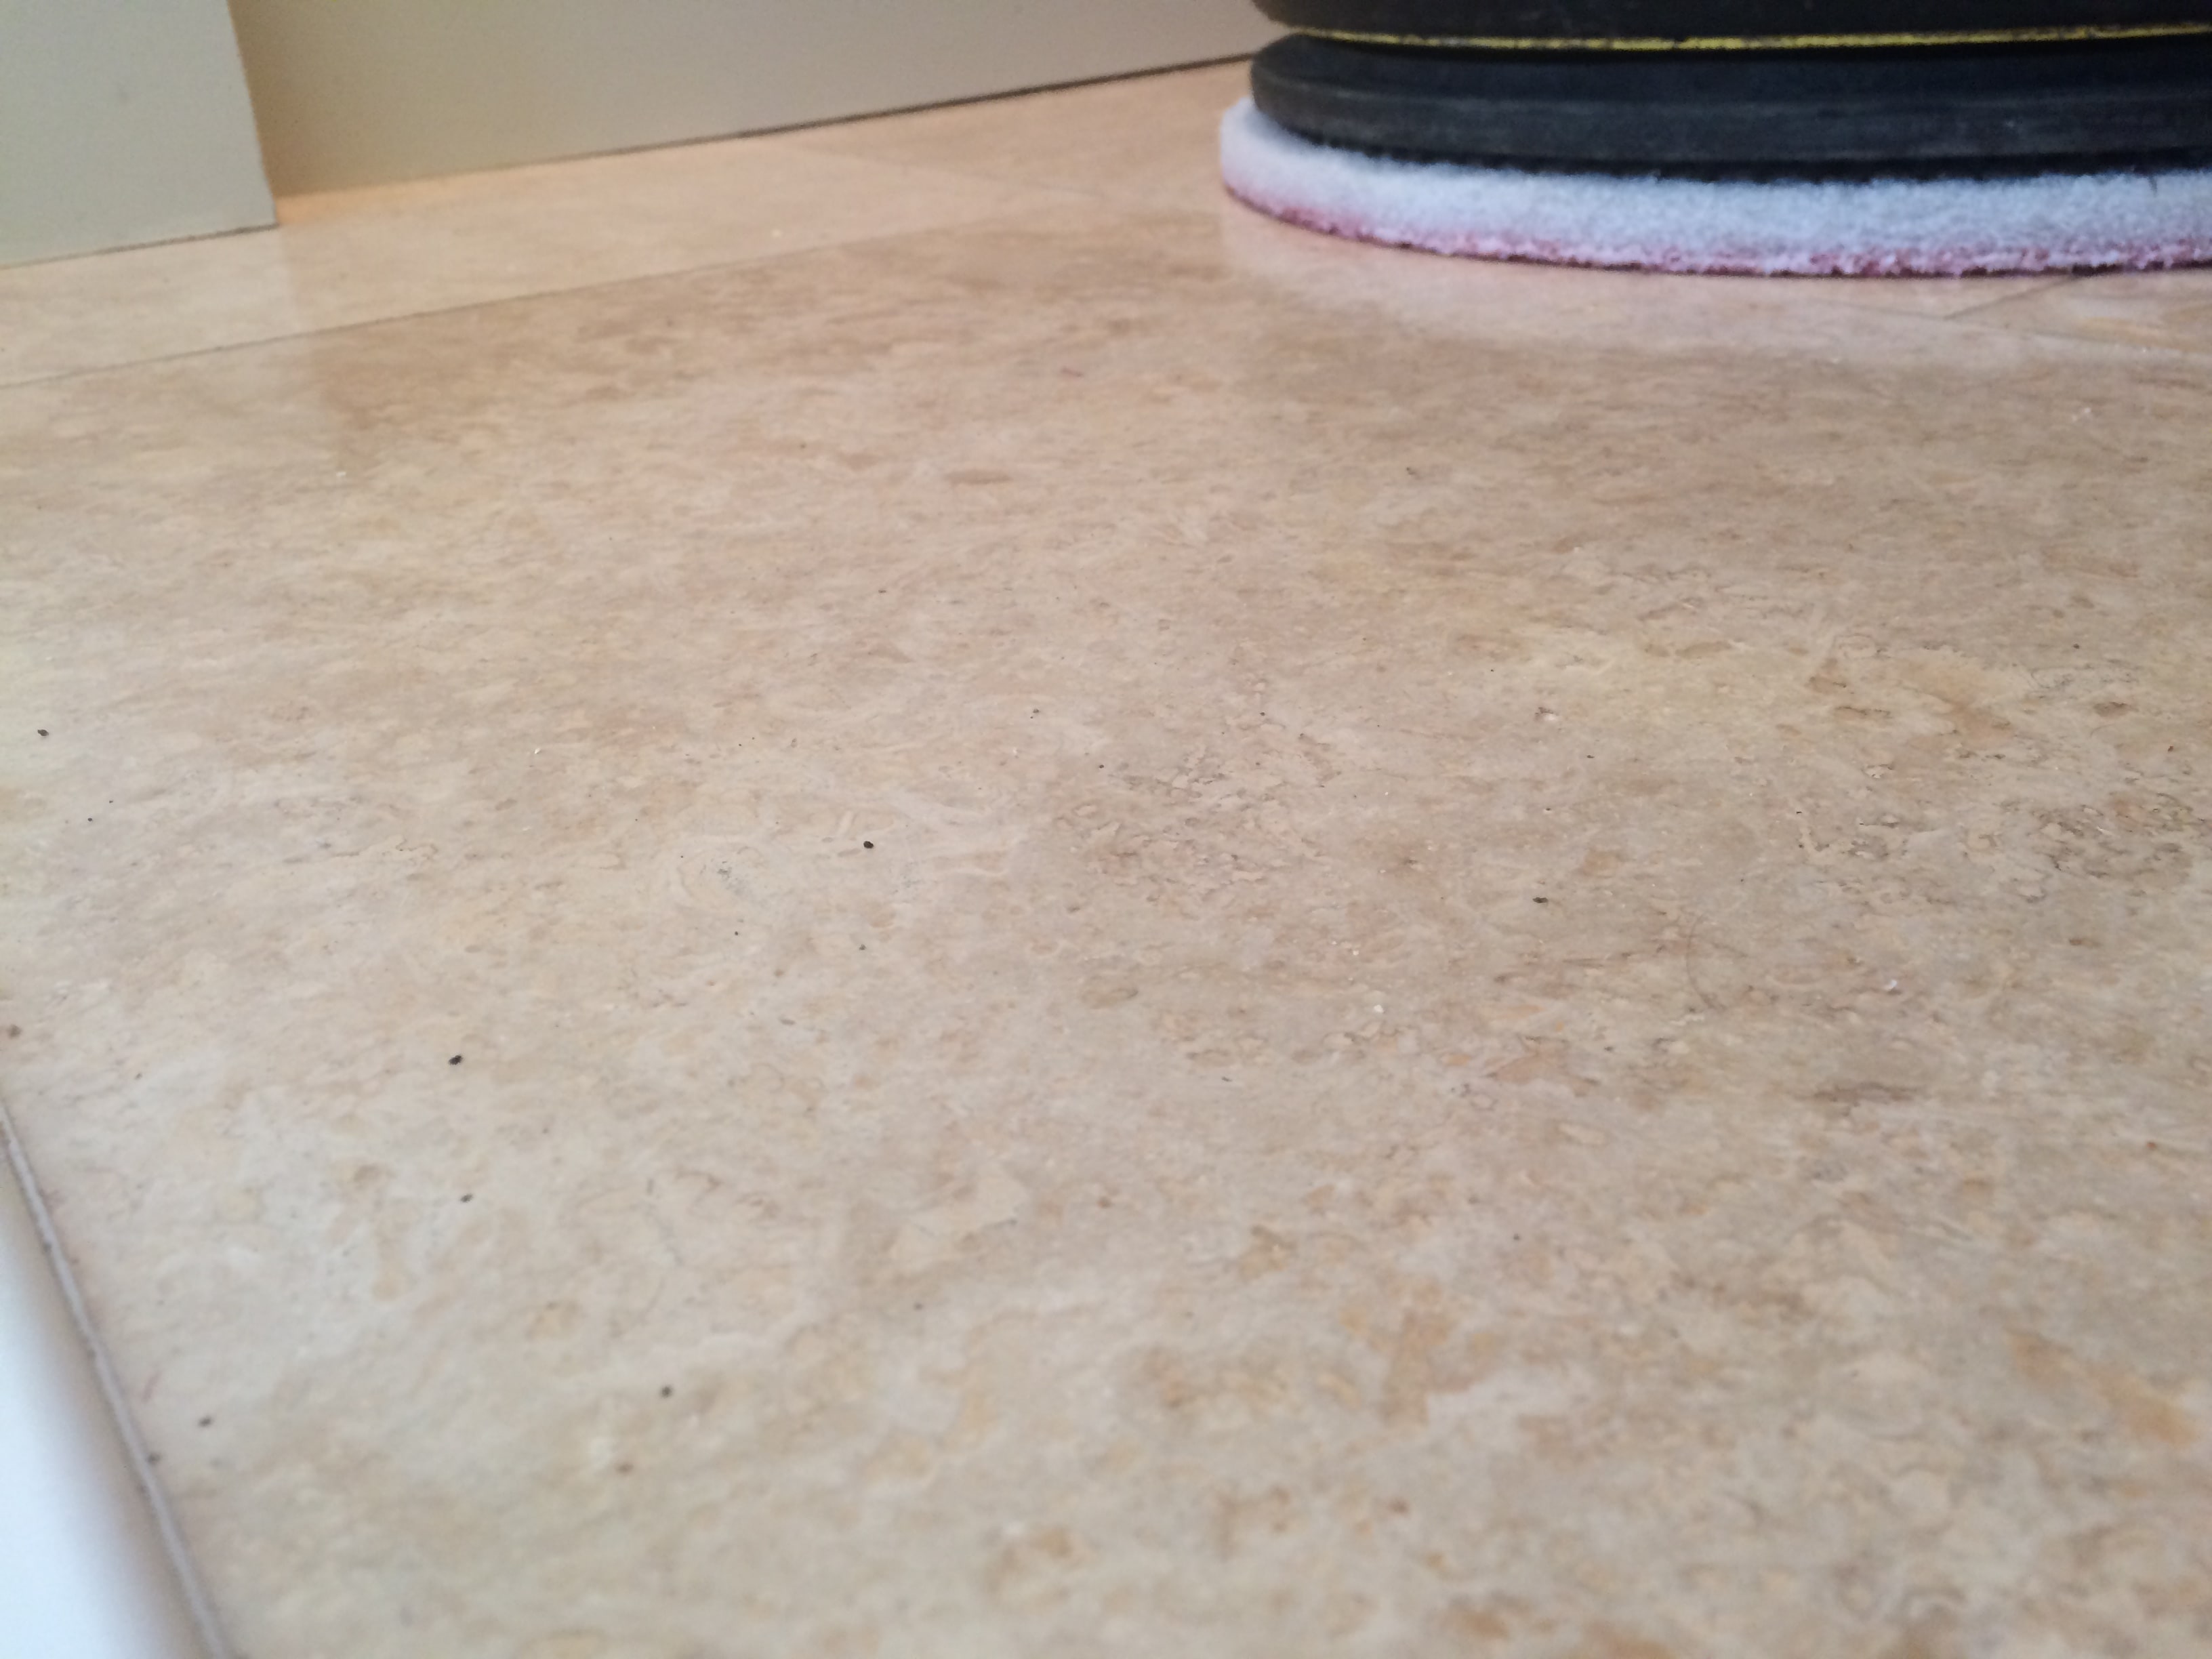
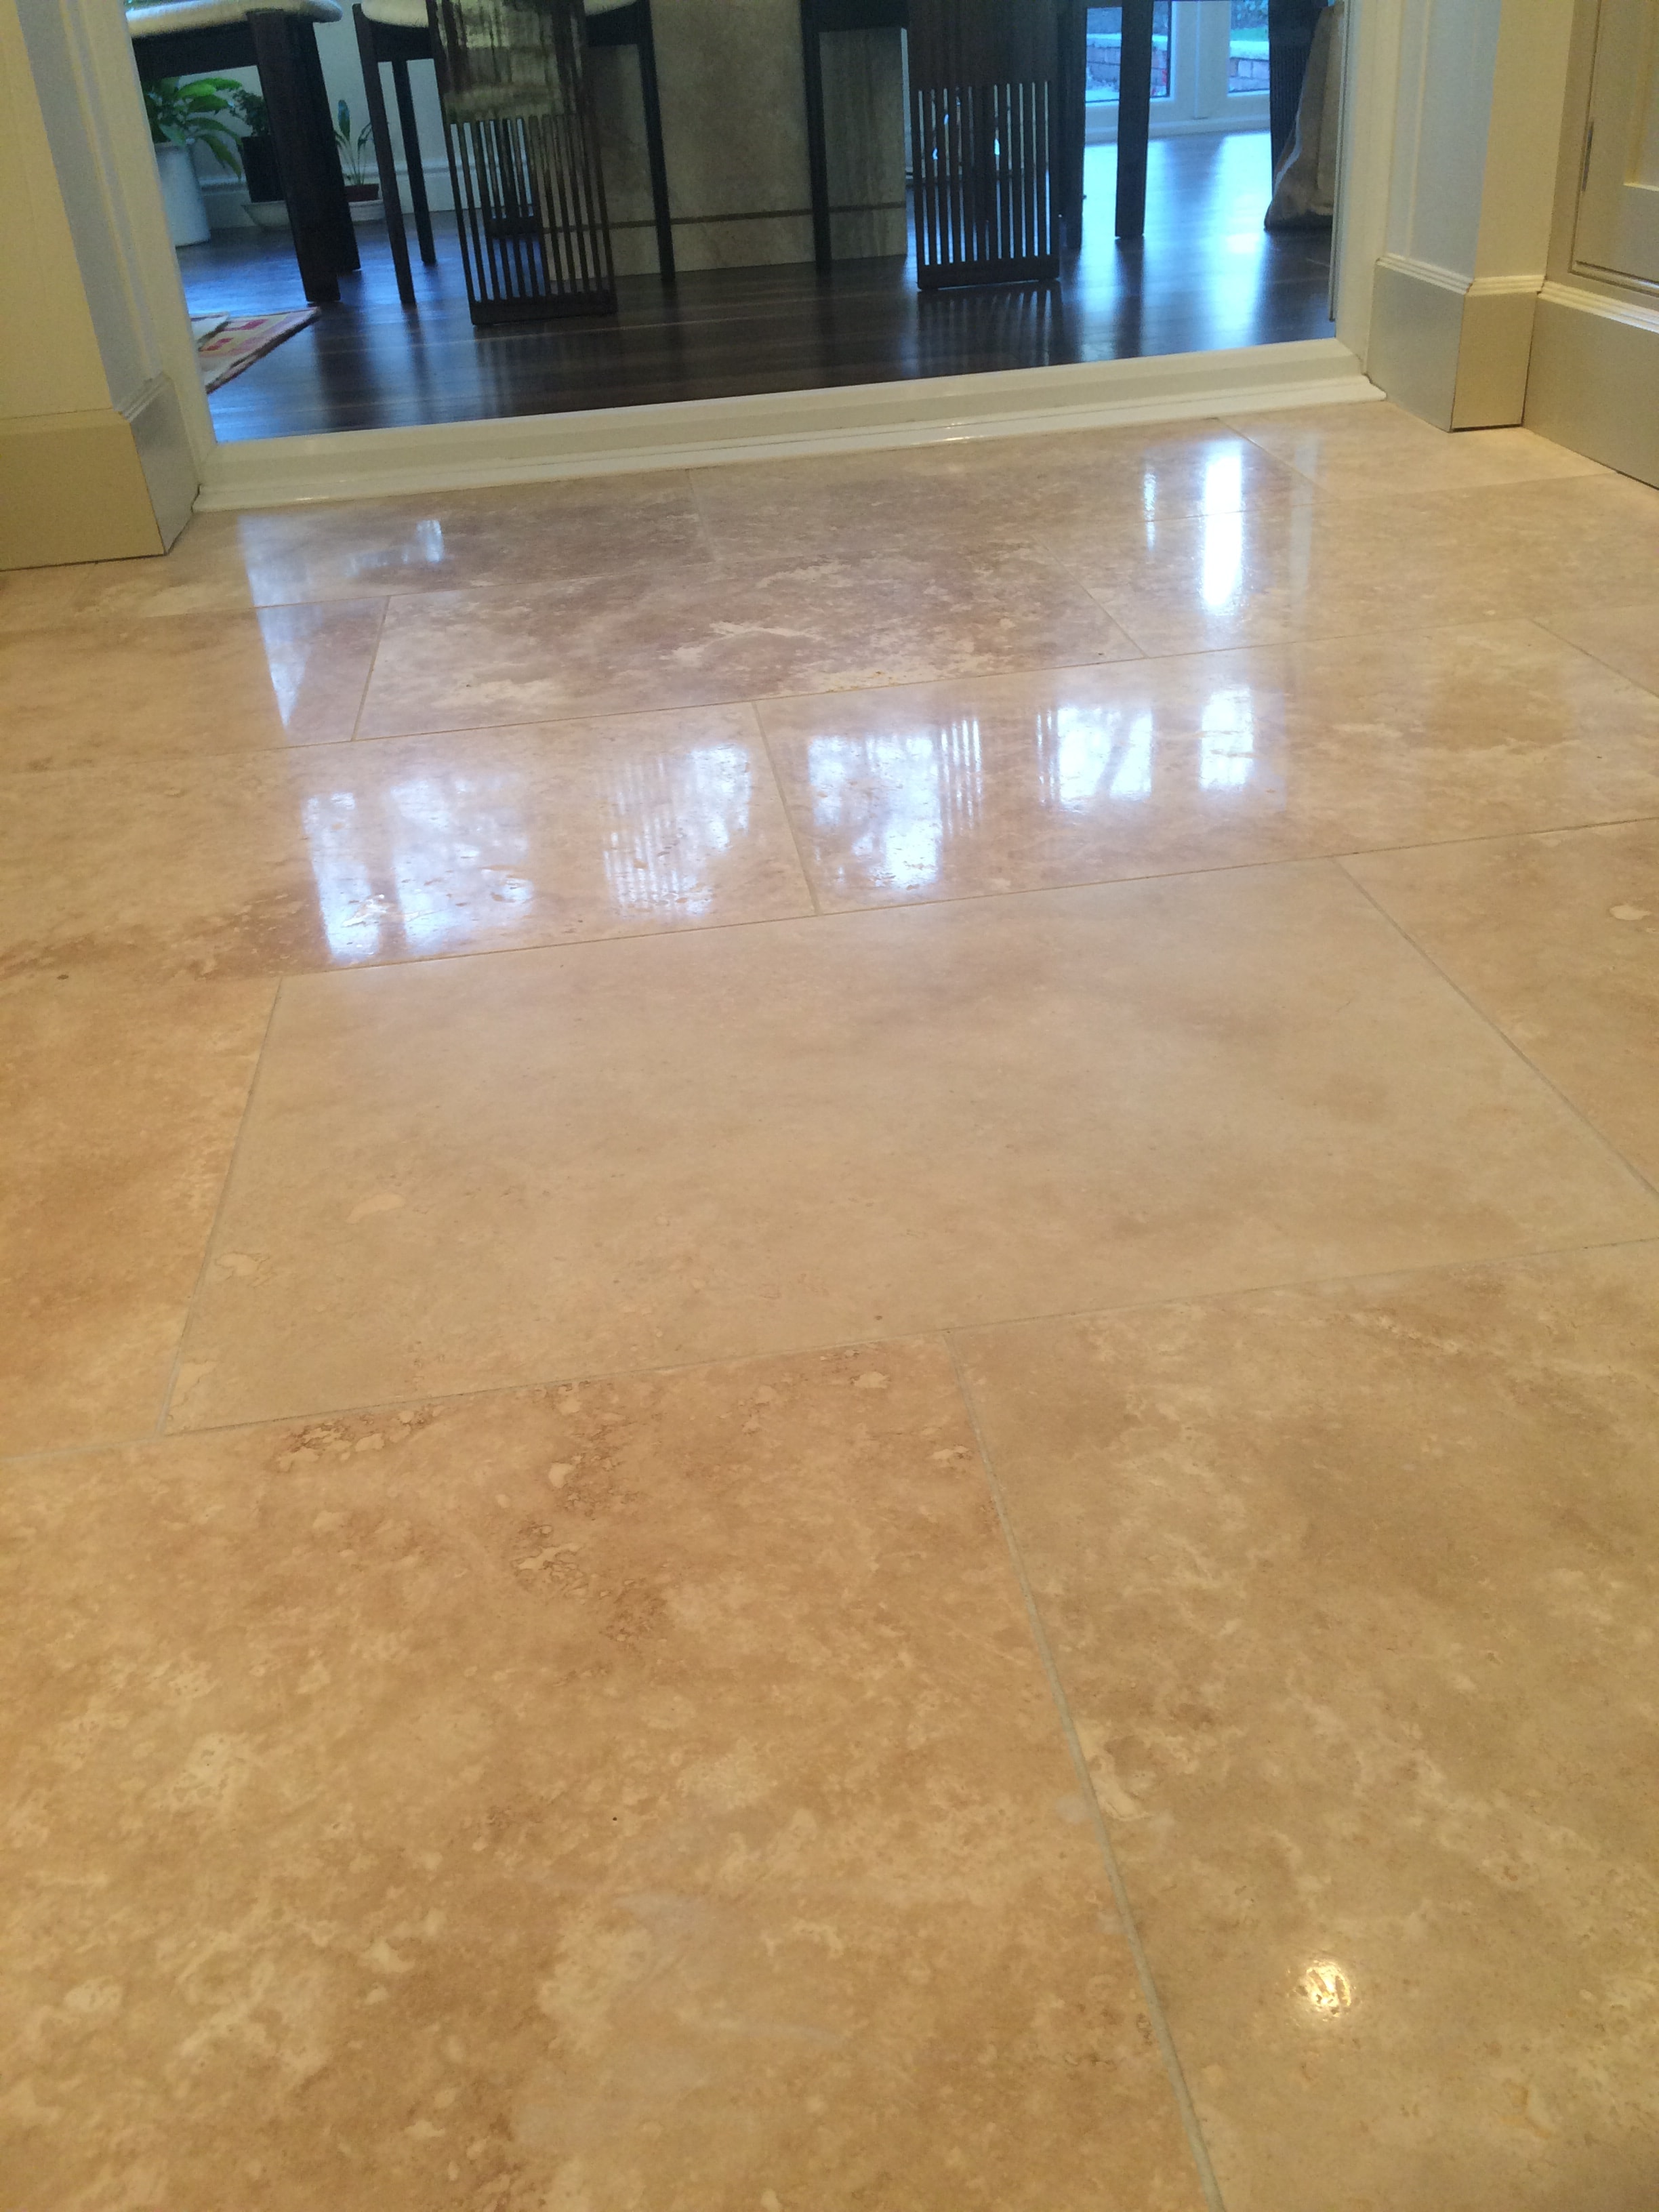
Close-up photo below of a Travertine tiled floor installed in a house in the former mill town of Blackburn where simply put the polished appearance had worn off and was now looking dull and unappealing.

Travertine Tiled Floor Before Polishing Blackburn
I popped round to the house to take a look and could see that the tiles would need to be burnished to restore the polished appearance. To demonstrate the difference this would make I polished one of the tiles using the Tile Doctor burnishing pad system which consists of the application of four 17 inch diamond encrusted pads applied in sequence from coarse to very fine with a rotary buffer. The customer was amazed at the difference and we agreed a date to come in and complete the whole floor in time for the Christmas holidays.

Stripping and Re-Polishing Travertine

On my return I repeated the burnishing process across the entire floor starting with the 400 Grit Coarse Red No.1 Burnishing Pad which strips off old sealers and dirt from the tile. You use a little water to help lubricate and once complete it’s necessary to rinse the area with water to remove the soil that is generated. The next step is to start building back the polish with the 800 and then 1500 grit pads which are applied in the same manner.

Travertine Tiled Floor During Polishing Blackburn
The floor was then rinsed again with water and I turned my attention to the grout which was scrubbed by hand using Tile Doctor Pro-Clean and a stiff brush. The floor was given another rinse and then inspected to ensure I hadn’t missed anything. Before leaving for the day I used the wet vacuum to extract as much moisture from the floor as possible.

At this point the customer commented that the floor looked amazing and that the floor never looked this good, even after it was first installed.

Sealing Travertine Floor Tiles

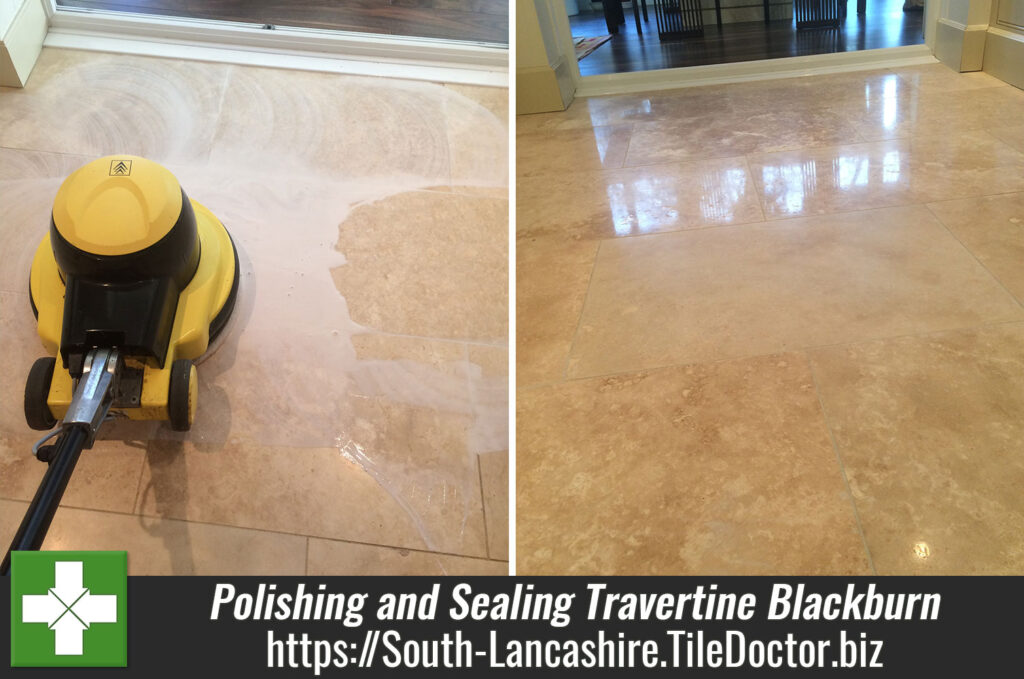
On the second days we used the 4th burnishing pad which is a 3000 grit pad to burnish and polish the surface until it came up looking gorgeous and glossy. With this pad you simply spray a little water on the floor during the polishing process, something we call a spray burnish.

The last step was to seal the tiles using a single coat of Tile Doctor Ultra-Seal which was applied and then buffed in with a white pad to remove any excess. Ultra-Seal is a premium, no-sheen, natural-look, penetrating sealer formulated to provide maximum stain protection.

Travertine Tiled Floor After Polishing Blackburn
The customer was really pleased with the difference we had made to the floor and before leaving we advised the customer of the best way to maintain the floor using neutral PH cleaners and to avoid strong cleaning products which can erode the life of the sealer prematurely.

Honed Travertine Tiled Floor Polished in South Lancashire

Polishing and Sealing Travertine Tiles in Blackburn Read More »
Cleaning Student Shower Cubicle Tile and Grout at Oldham University

Cleaning Student Shower Cubicle Tile and Grout at Oldham University

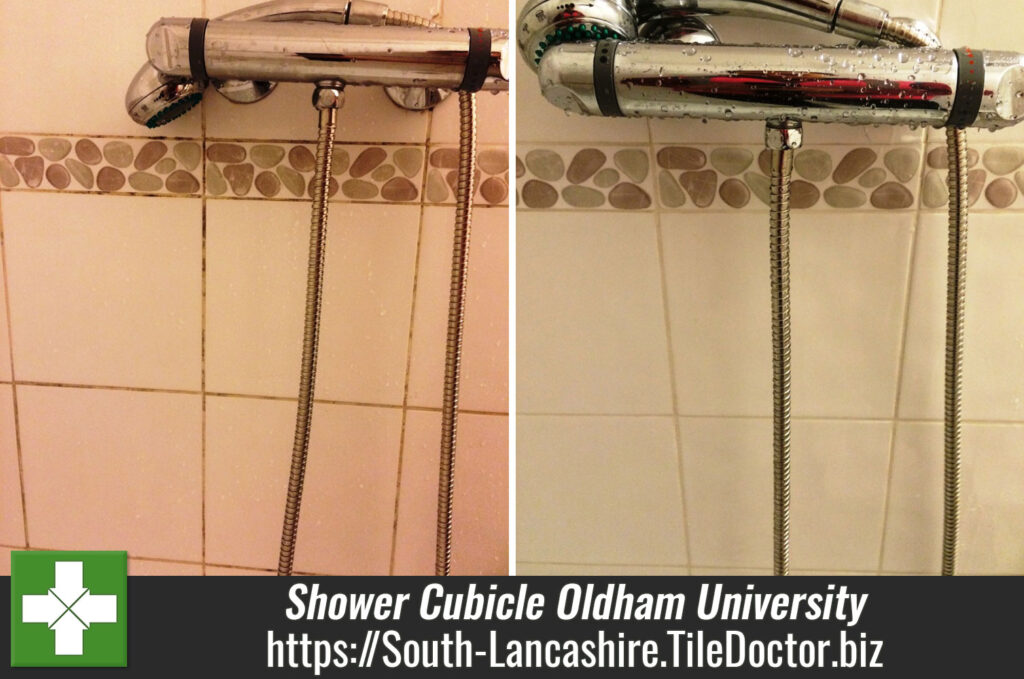
Earlier in the year we were contacted by the facilities manager of one of the student apartment blocks in Oldham which provides accommodation for the students of Oldham University. They were looking for a firm to revamp the student en-suite bathrooms during the summer recess. The building has 270 apartments and we had been asked to quote for the renewal of the ceramic tile and grout of around 45 shower cubicles (possibly more) which were judged to be in a bad state and beyond the ability of their in-house cleaning team.

The University runs degree courses from Accounting to Sports Coaching and as you can image Students are not known for their cleanliness so we knew we would have our work cut out completing the assignment on time.

Several companies competing for the work however after successfully demonstrating what we can do with a patch test in one of the bathrooms and comparing of quotes I’m pleased to say the facilities company awarded us the contract!

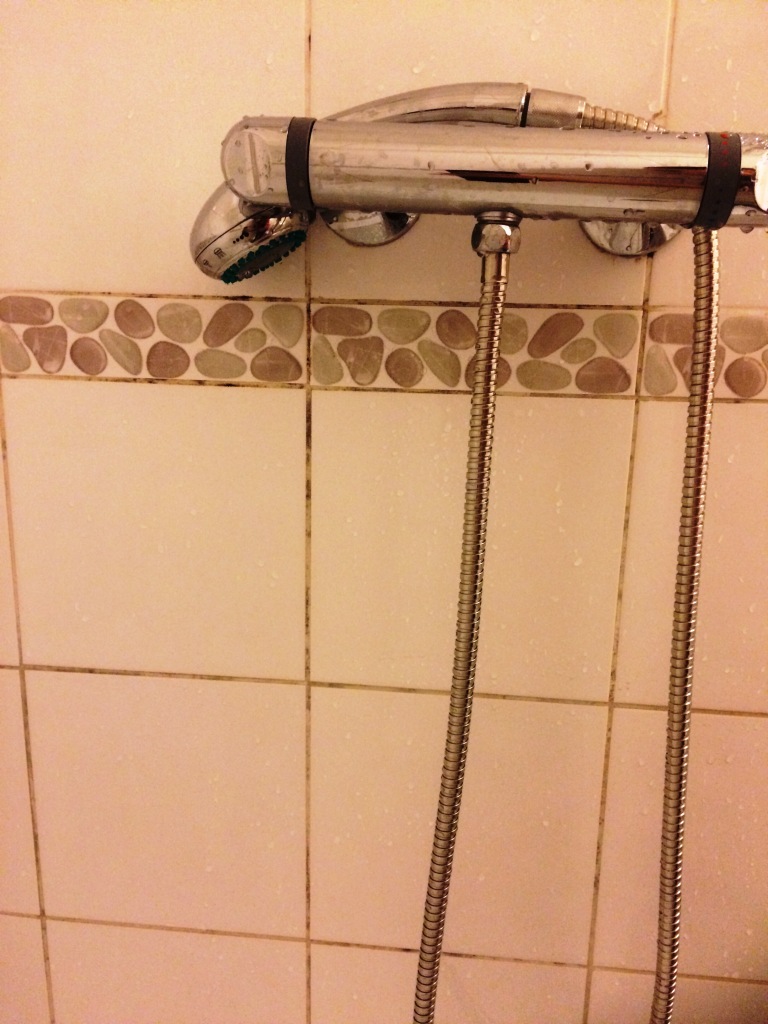
Student Shower Cubicle Before Cleaning in Oldham

Tile and Grout Cleaning

We returned in the summer and facing a time limit to complete the work we worked out a system whereby we would spray the Tile and Grout down with Tile Doctor Duo-Clean, let it soak in for about ten minutes and then scrubbed it in by hand with a stiff brush. Duo Clean is an effective double action grout cleaner and mould remover that can remove mould and blackspot from grout and silicone. It’s really useful for cleaning shower tiles as the spay attachment mixes the product with air as its spayed onto the surface allowing it to stick to vertical surfaces more easily. Once the tile and grout was clean it was rinsed off with water and stubborn areas re-treated until clean.

Duo Clean is effective at dealing with Mould on Silicone in most situations however some of the silicon sealant was beyond cleaning so in these cases the old Silicone was stripped out and replaced with new.

We were able to clean all the shower tile and grout using this process however I had brought a long a few Grout Colouring kits as a back-up solution just in case. Once the grout is clean the colourant is painted on using a small brush and makes a huge difference to the look of a shower. There also inexpensive and provide a barrier over the grout so it keeps its appearance for longer.

There were a lot of bathrooms to cover so once the cubicle was spotless we immediately moved onto the next one completing the whole project three days ahead of the due date.

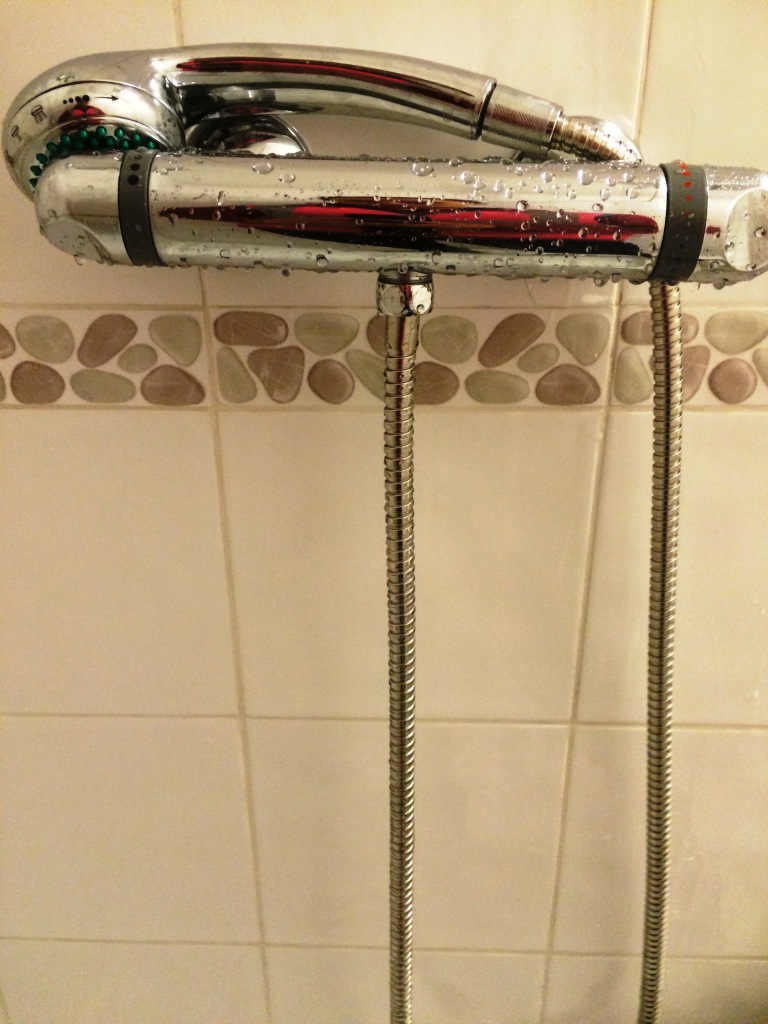
Student Shower Cubicle After Cleaning in Oldham
The facilities manager was delighted with results and timing of our work and it just goes to show that using the right cleaning products can save you time and money compared to the alternative of re-grouting.

Commercial Shower Cubicle Cleaning at Oldham Student Accommodation

Cleaning Student Shower Cubicle Tile and Grout at Oldham University Read More »
=================================

South Lancashire Tile Doctor

================================= Read More »
Scroll to Top